
Intro
It is officially Burp Extensibility Month. Burp Suite is the most used security tool, when it comes to web application security. It already has many built-in features. However, Burp Extensions allow you to level up your existing testing processes, and workflow.
There are a lot of them with most of them being available for Burp Suite Community Edition users. In this blog post I would like to talk about some of them that I use quite often when I am testing for Bug Bounty Programs or when I am doing CTFs.
Intigriti Quick Scope
This one is fairly simple but has been expected for ages by bug bounty hunters like me that are mainly hunting on Intigriti. I’ll keep this one short and brief. What it does is basically using your API key it will fetch available programs on Intigriti.
Let’s say you are currently testing for DigitalOcean. All you have to do is search up the Program’s name and click on Apply Program to Project.
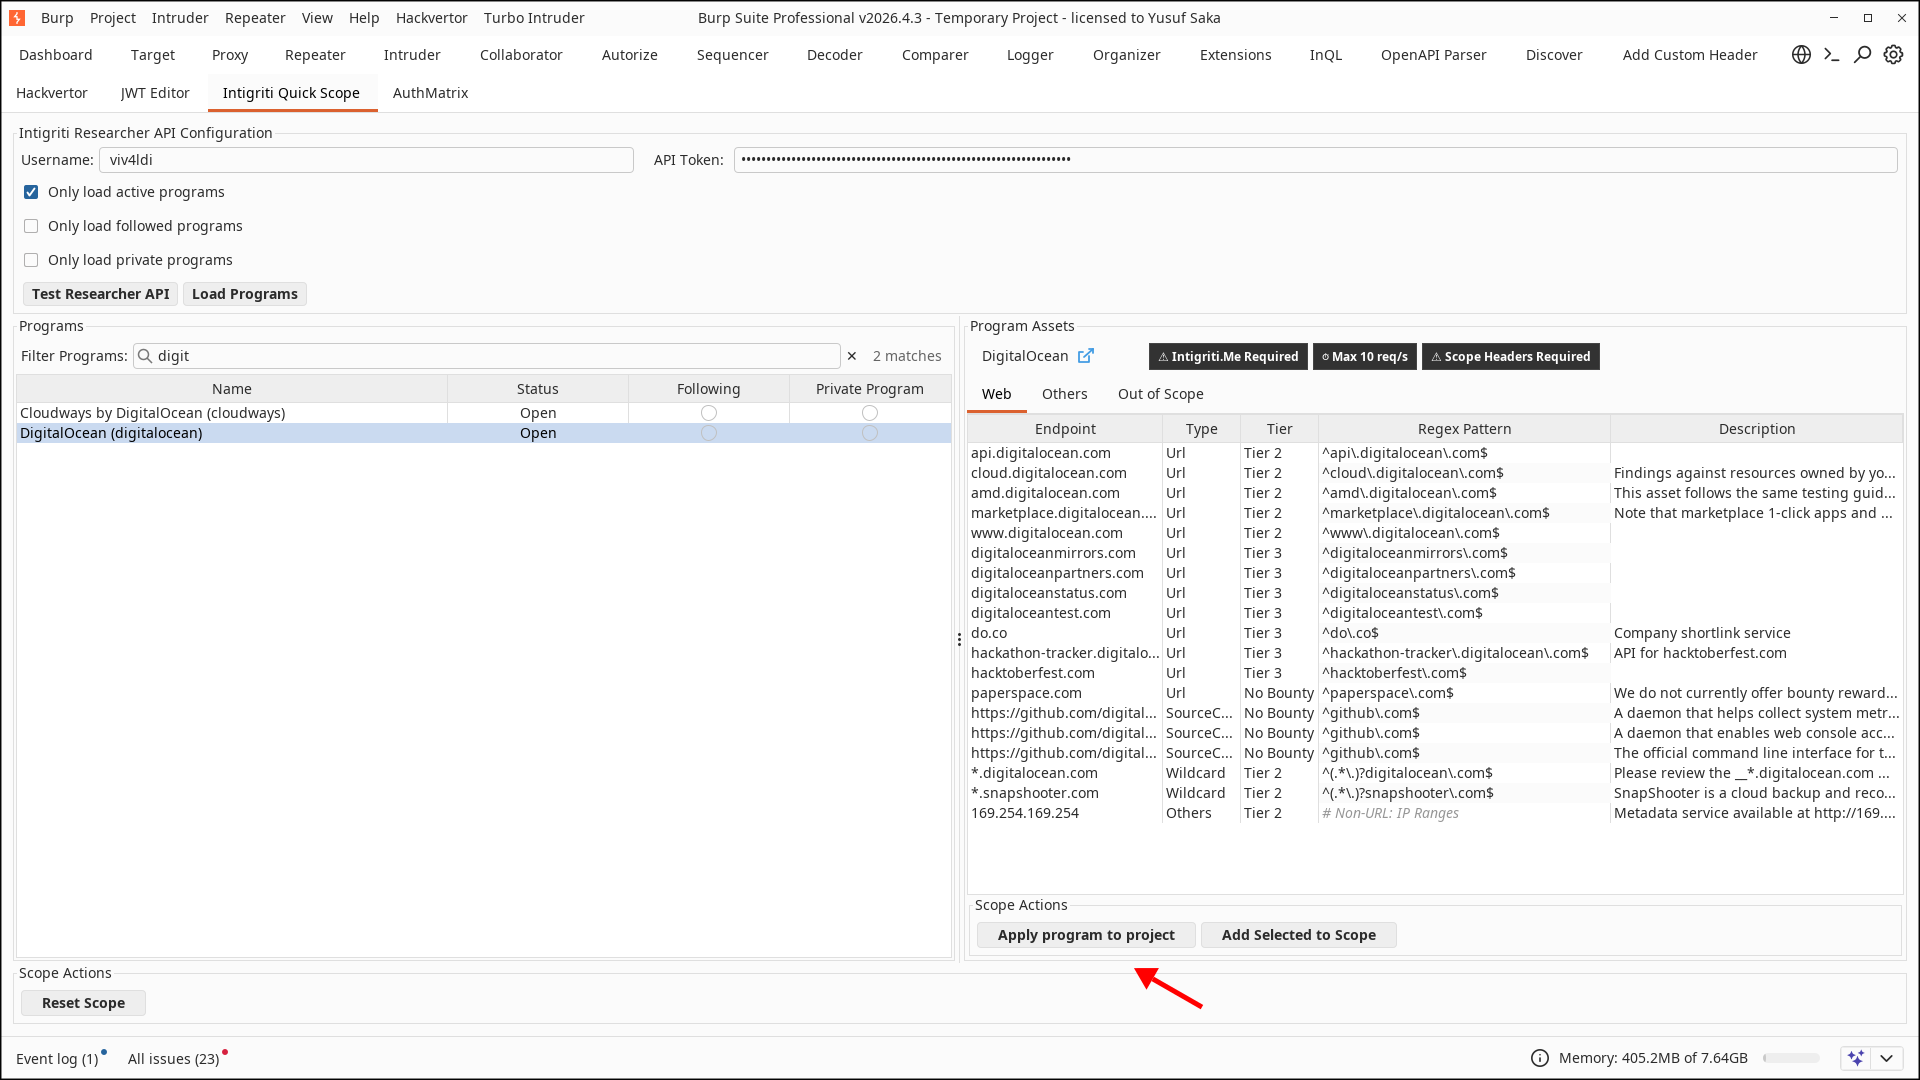 And voila. You have your target scope ready, and you don’t have to worry about testing wrong stuff or missing endpoints that are in scope but you forgot to add them.
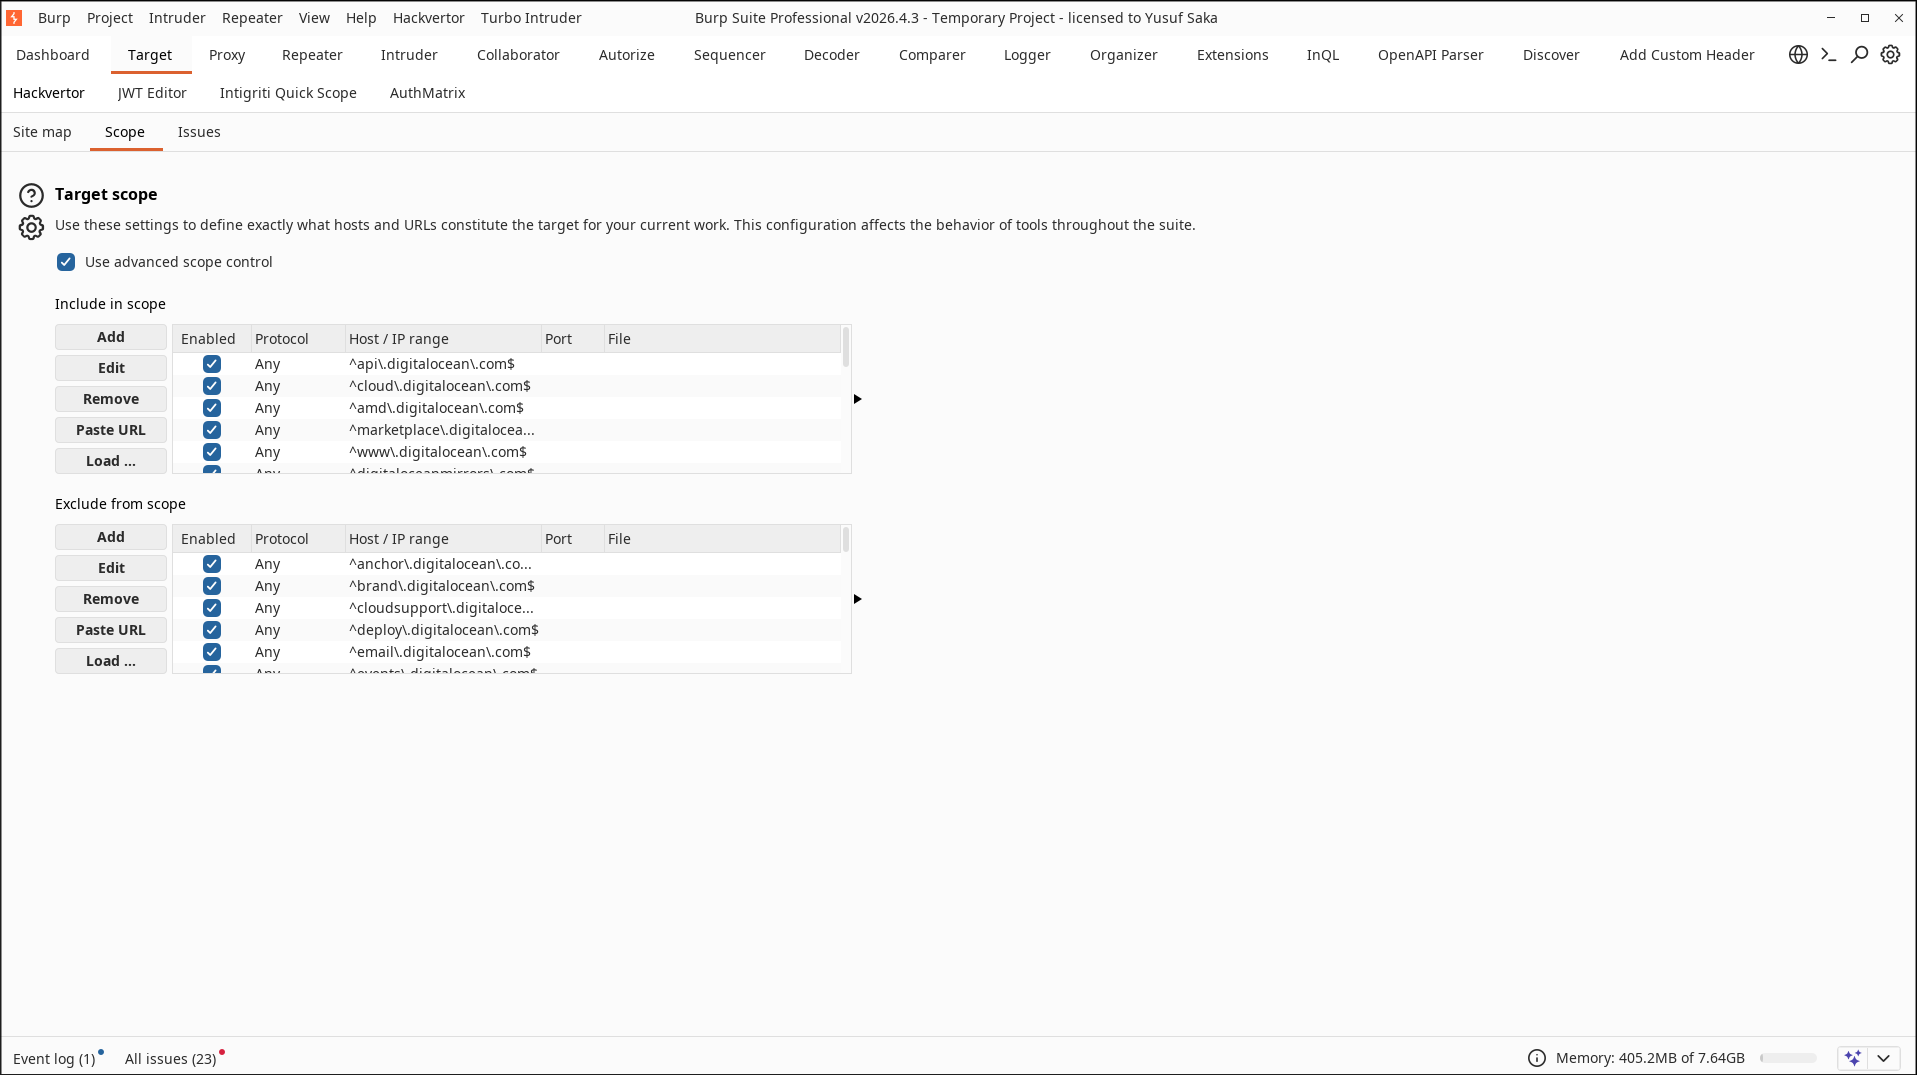
It also shows whether you have to use specific headers, and the maximum requests per second which makes me feel more secure during my testing.
Autorize
Looking at OWASP Top 10 for 2025, we can see that the broken access controls vulnerabilities still remain at top. And I can not emphasise enough how often I see simple IDORs like these in the wild.
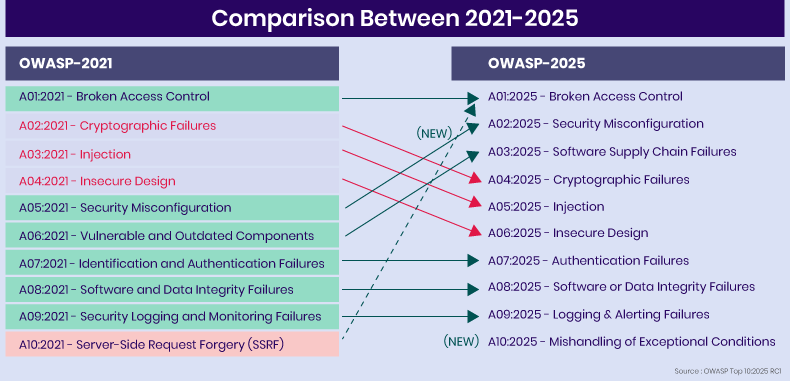
However if you are in the field of bug bounty, you will quickly learn that skill alone is not enough. You might find all those cool bugs, however if someone else finds the bug faster, you will not be rewarded. So not only the skillset is required, you also need to test faster. That means automating the footwork, so that you will spend your time and energy on what is actually useful. One way of automating broken authorization is by using the Autorize extension on Burp Suite.
I quickly vibe coded a web application using Claude to imitate a web application I tested recently, where this extension saved a lot of my time.
Here you can see, we have access to 3 different accounts
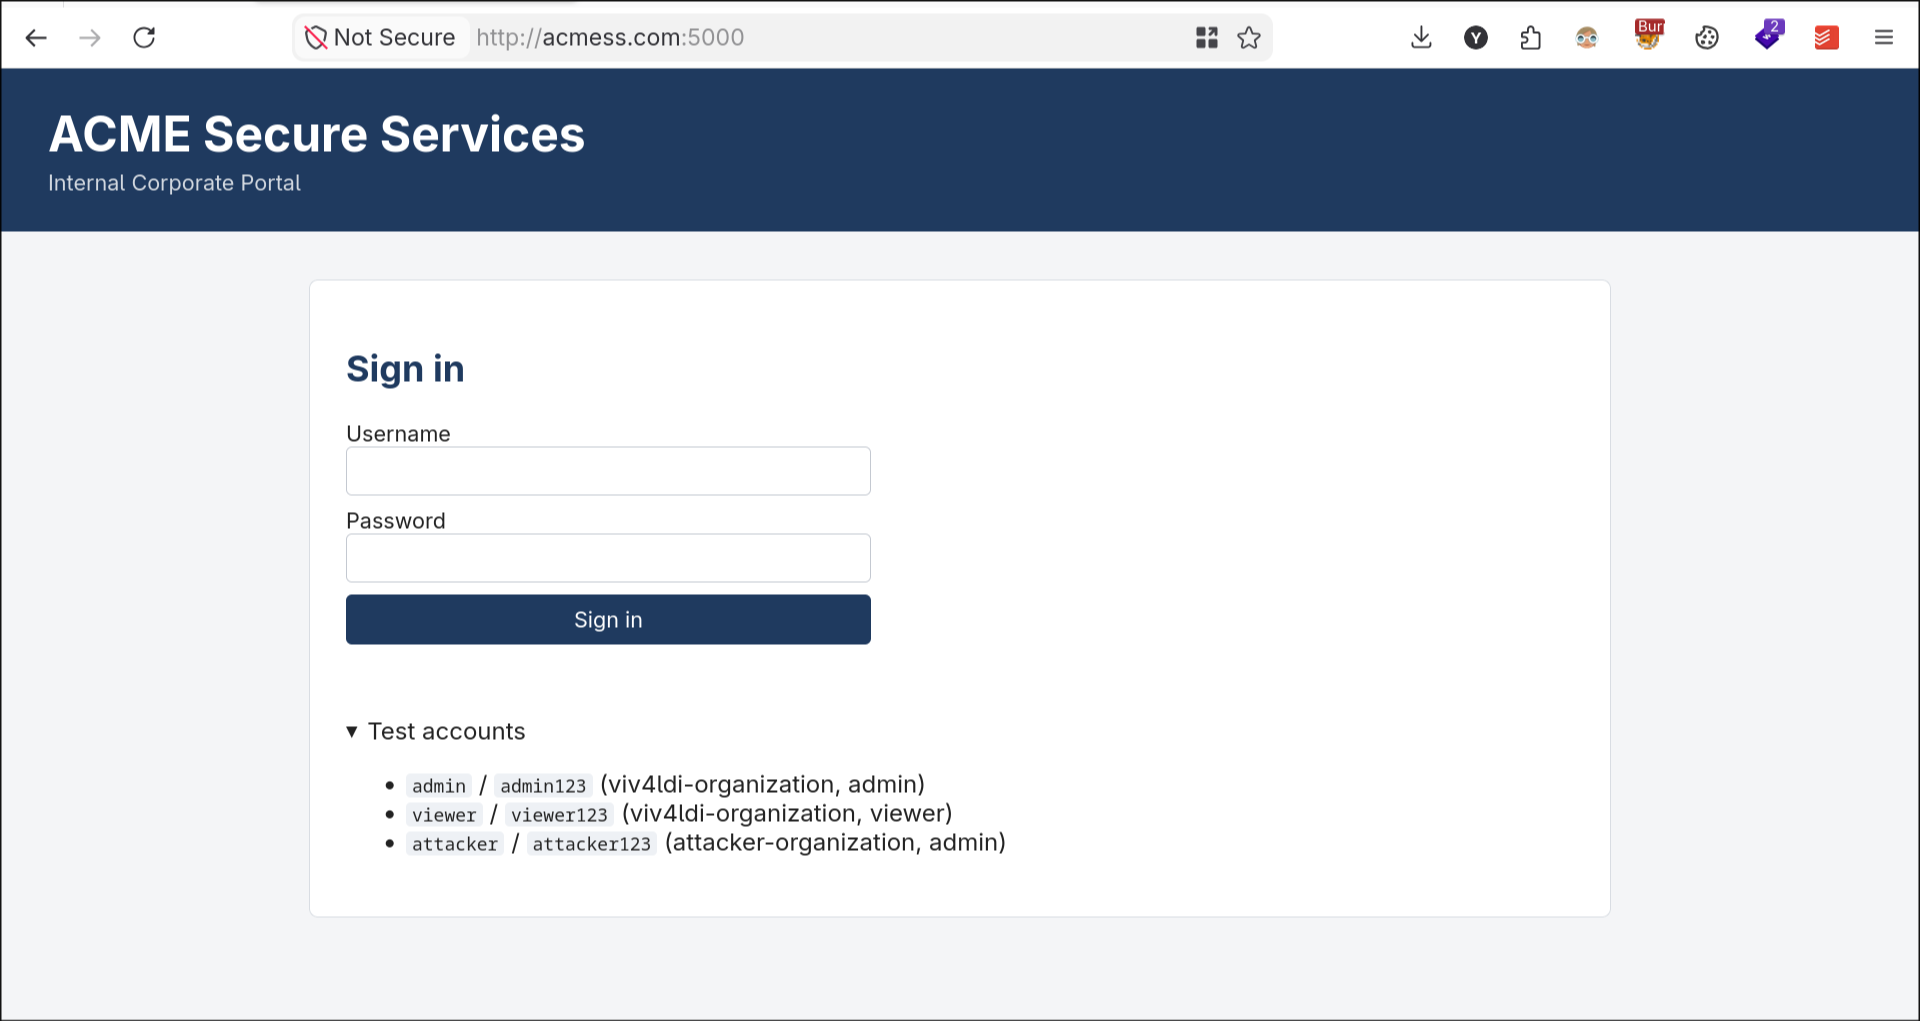
The admin user having full access on the viv4ldi organization, whilst even though the viewer user is on the same organization as well, he will only have read-only attributes. In such situation we can use Autorize to check for existence of any Privilege Escalation situations.
On the other hand we have a 3rd user called attacker, who has full admin rights on his own organization, but isn’t supposed to have access to the viv4ldi organization.
Before we set up our extension, I would like to give a hint when we start testing these sorts of vulnerabilities where you need multiple accounts.
If you browse through Firefox Add-Ons marketplace you can see the Firefox Multi-Account Containers extension.
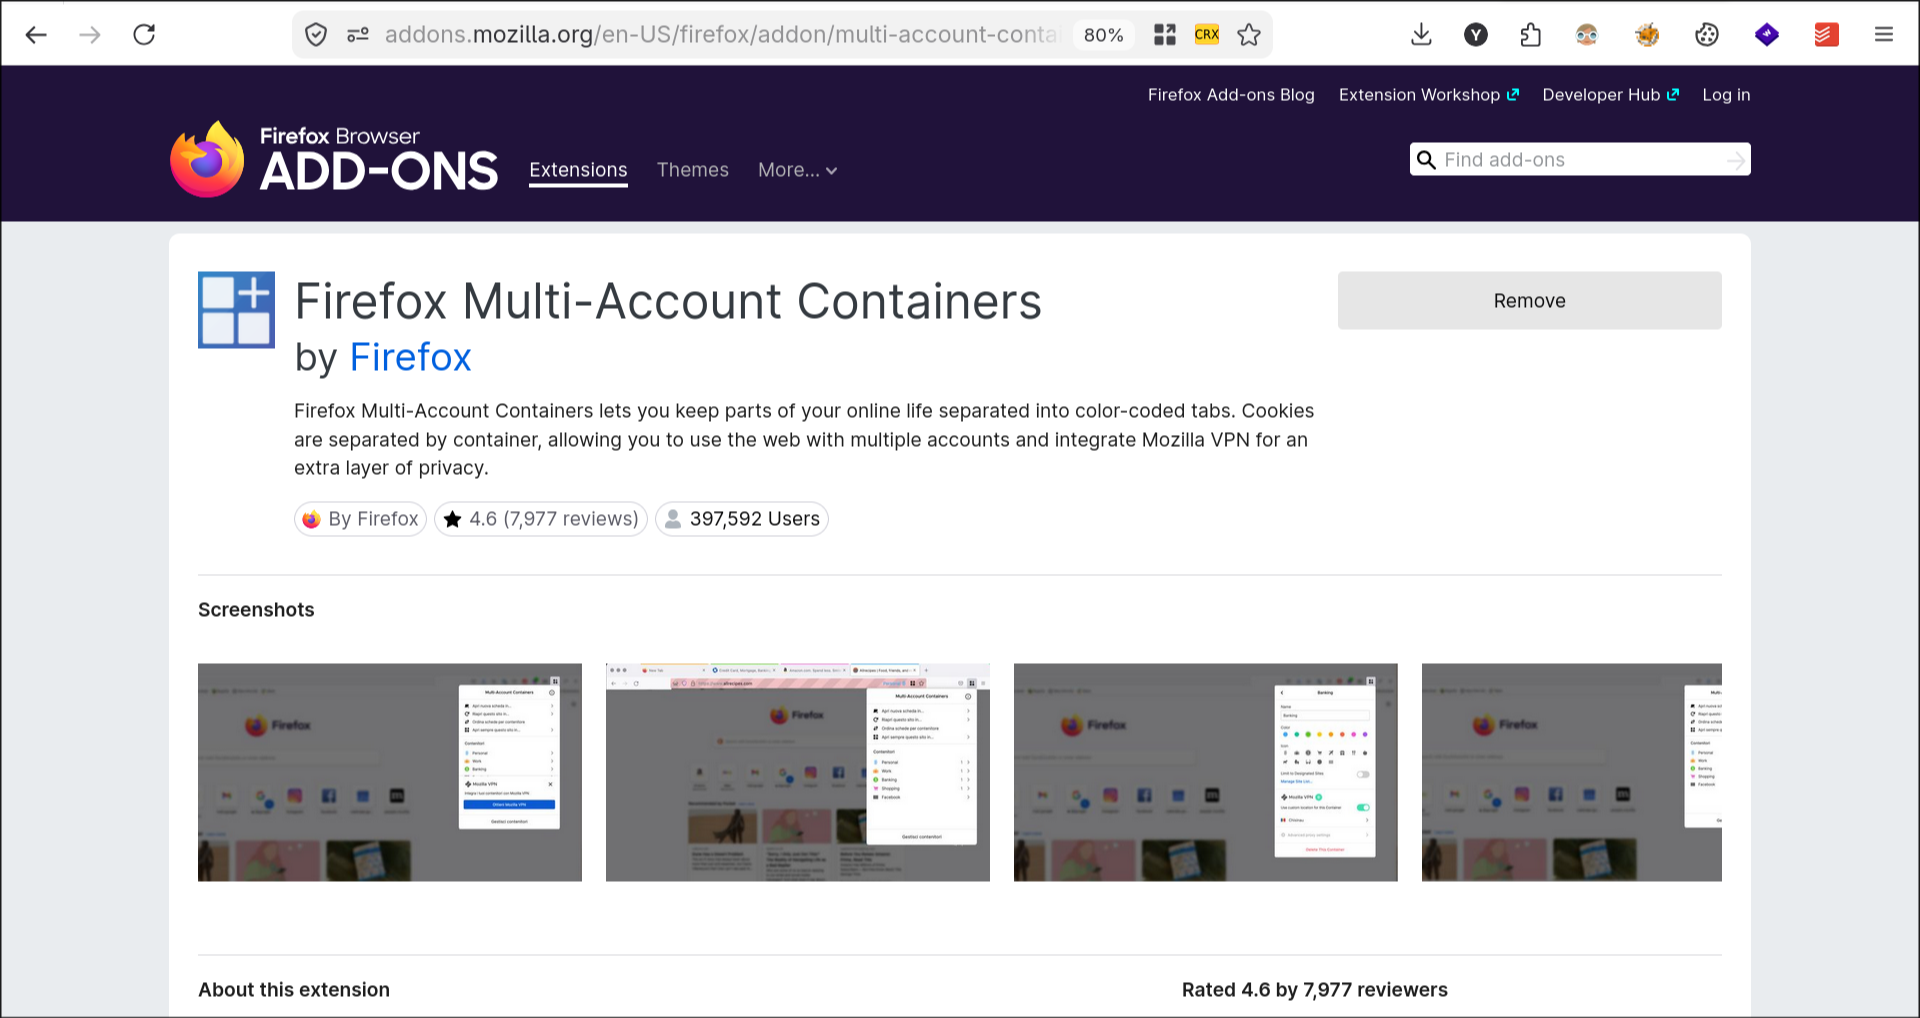
What it basically does is that, it allows you to work with multiple tabs that are isolated in their own containers. It is basically like working with different laptops. One container tab will not affect the cookies or session storages of the other tab.
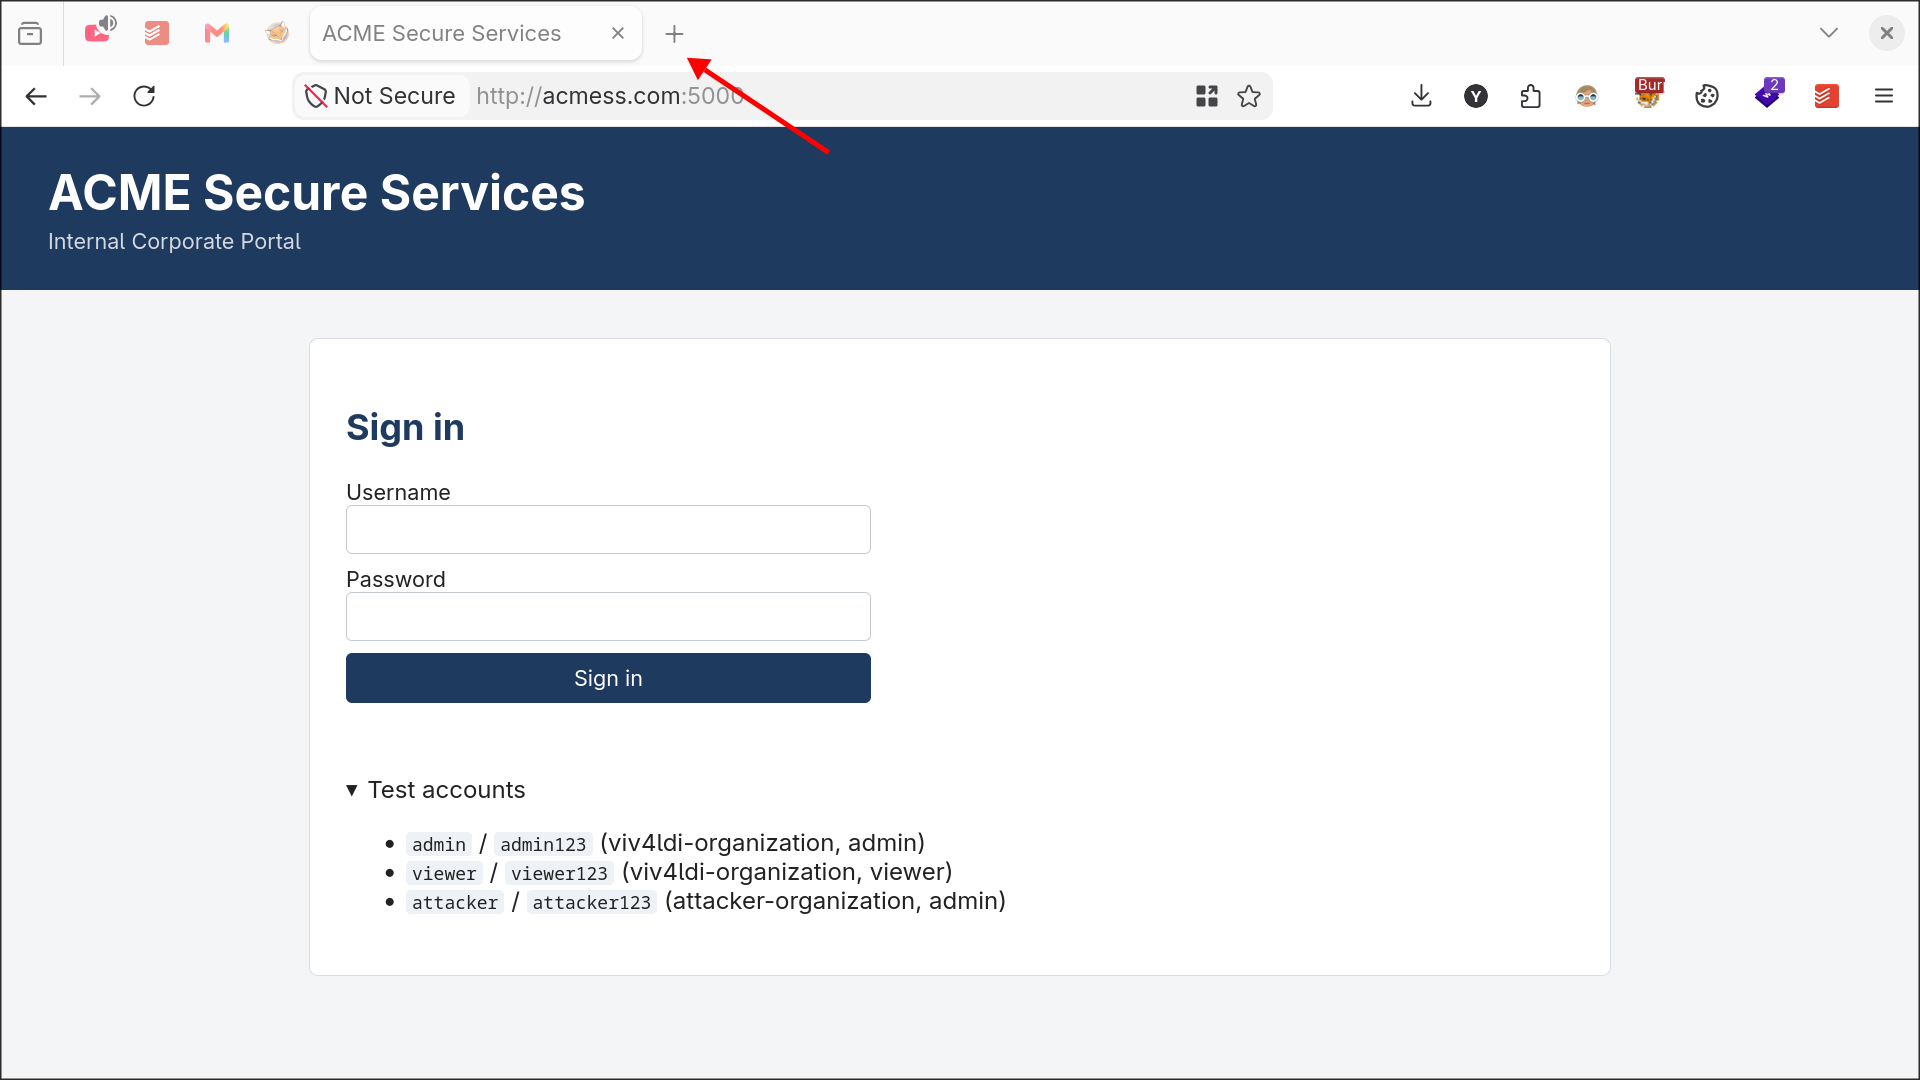
In order to start all you have to do is install and enable the Firefox Multi-Account Containers add-on, right click on the plus icon next to the tab you want to spawn. From there you can choose a container group
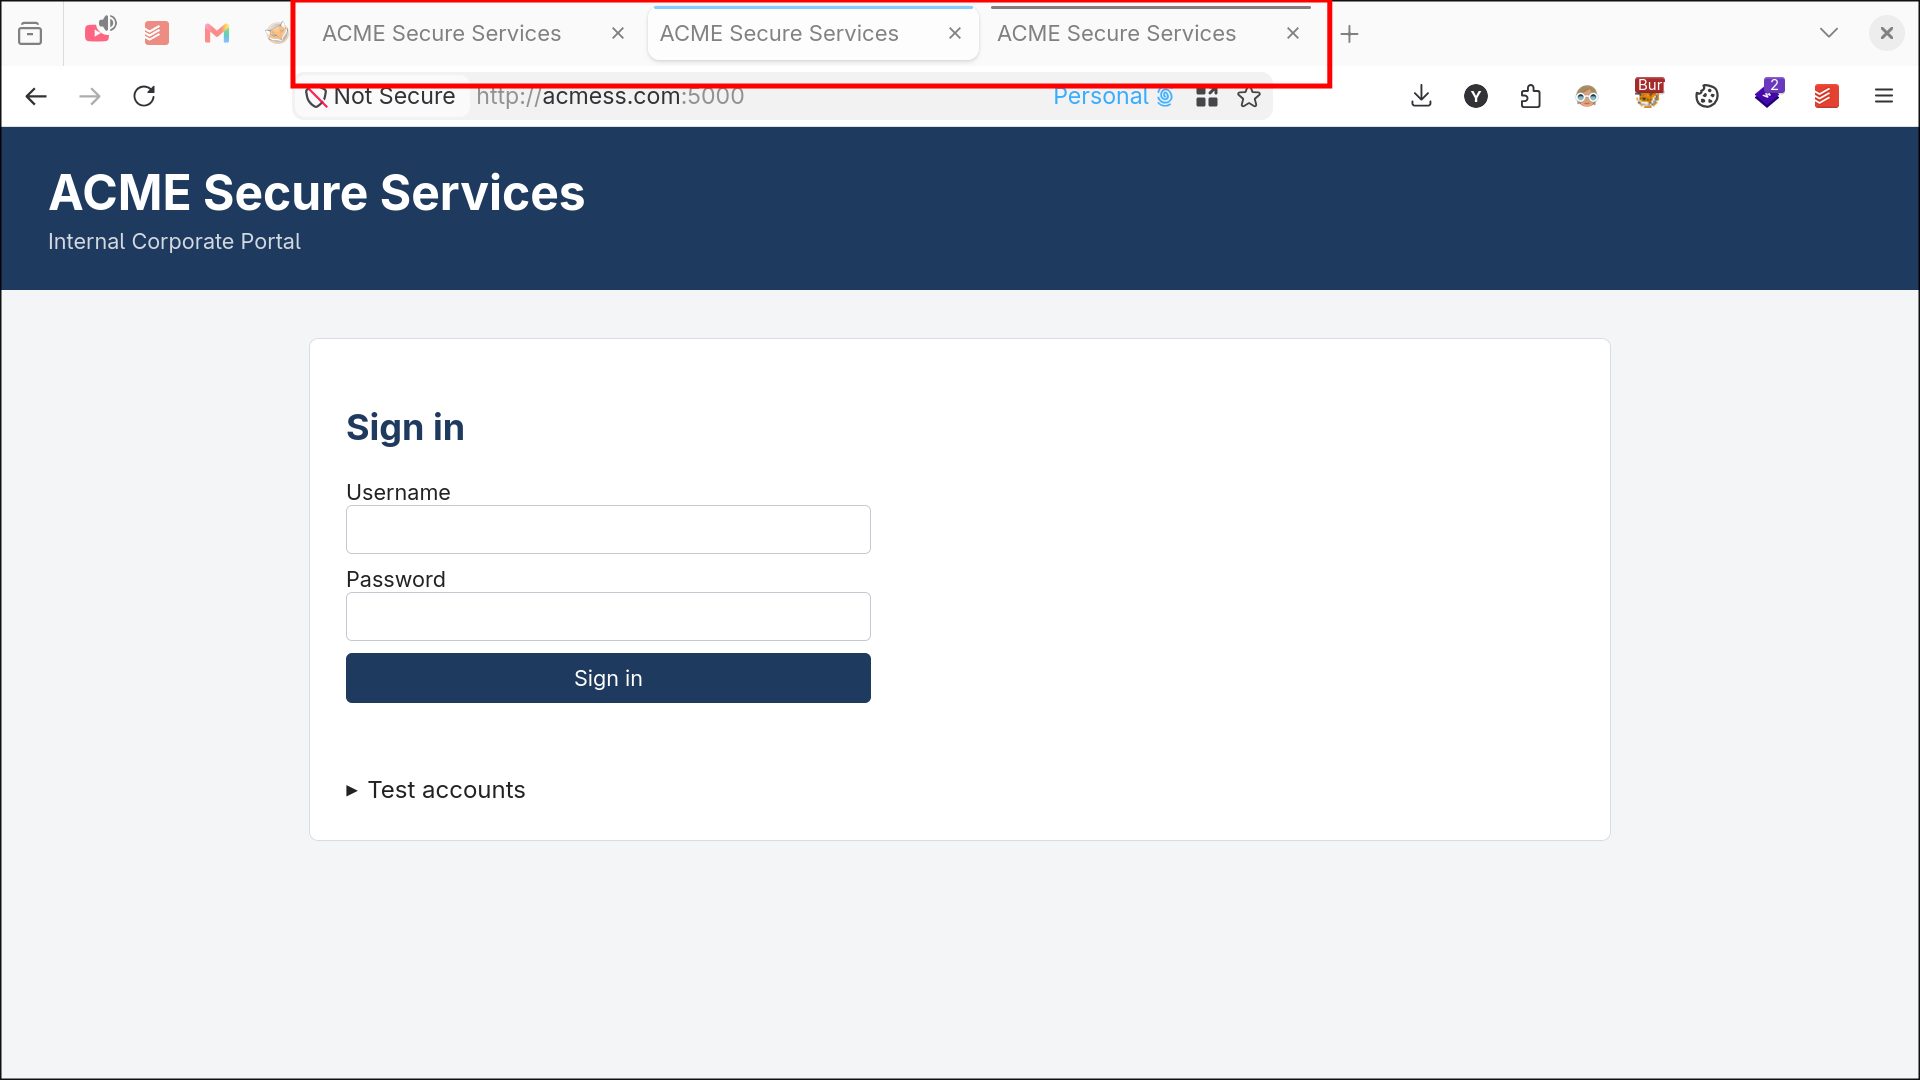
And there you have it, 3 different tabs with each having their own session information.
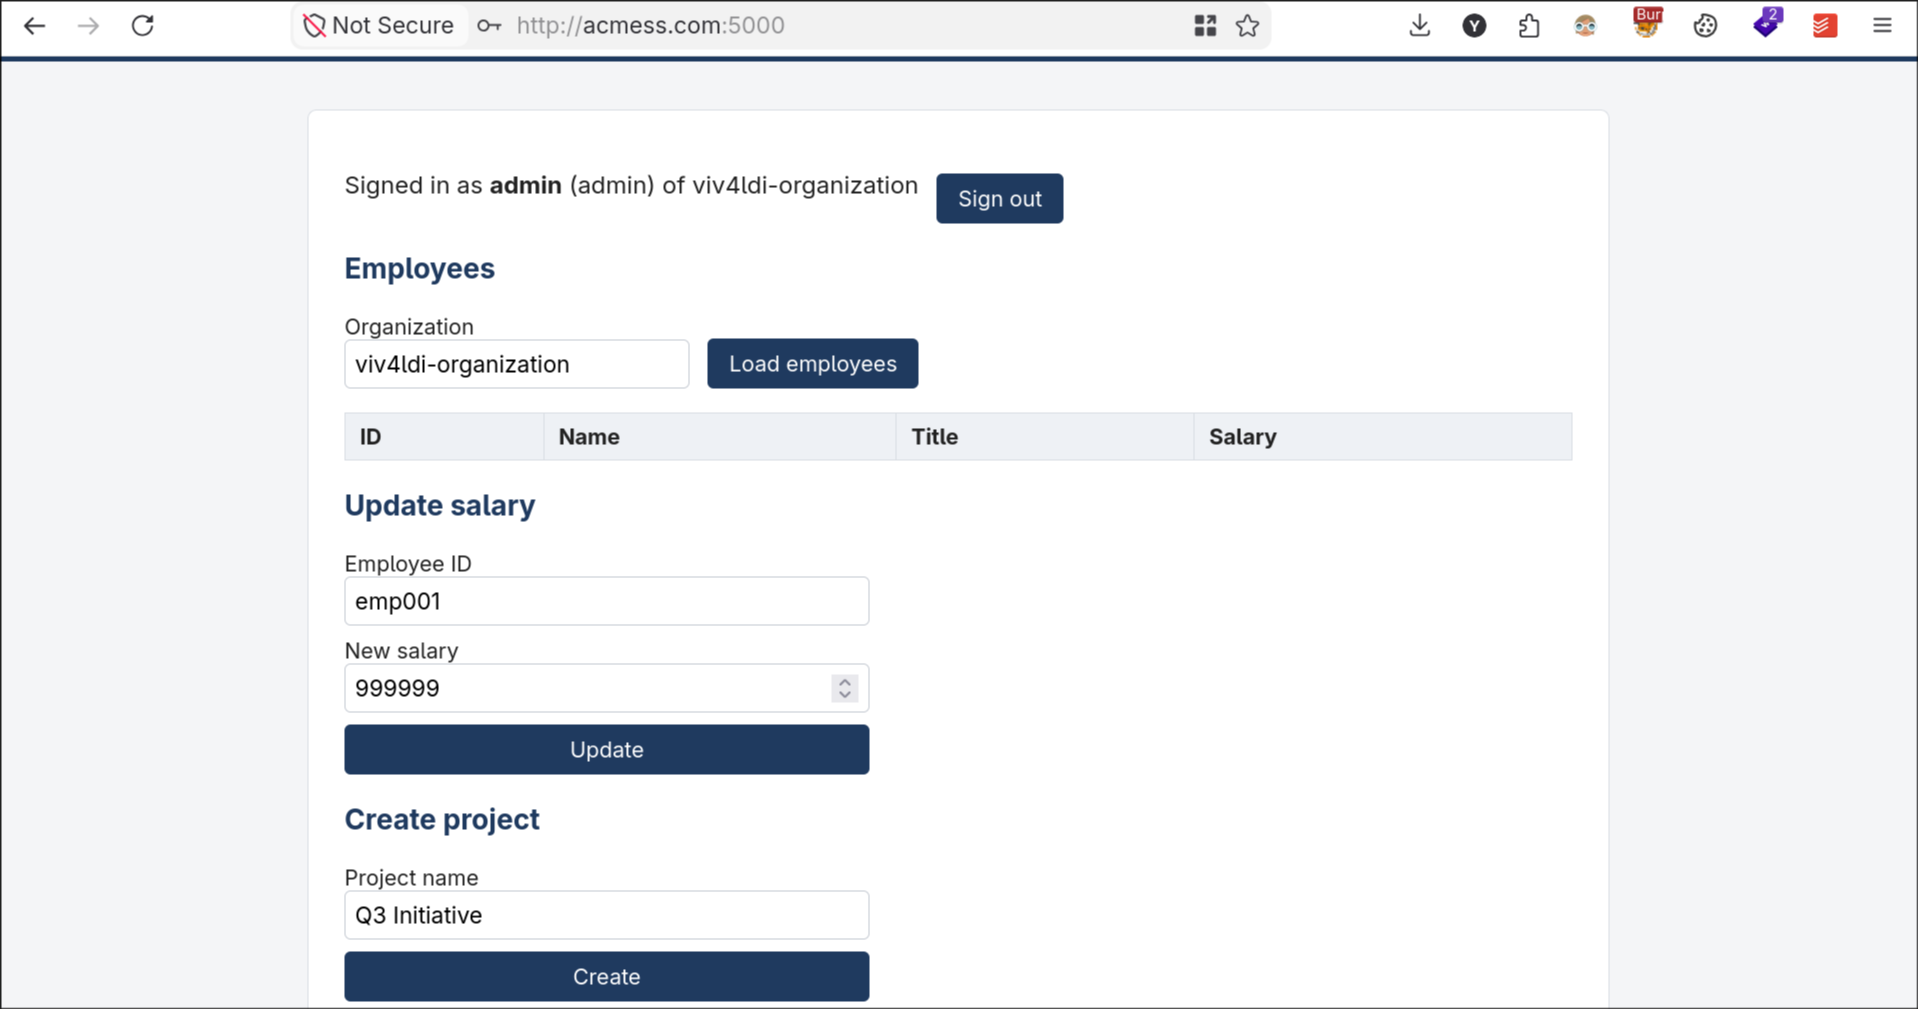
After logging in as each of the users we can see that the dashboard allows us to manipulate some corporate-specific information.
We could start testing by replaying every request one by one in our repeater tab, however that is not efficient nor fast.
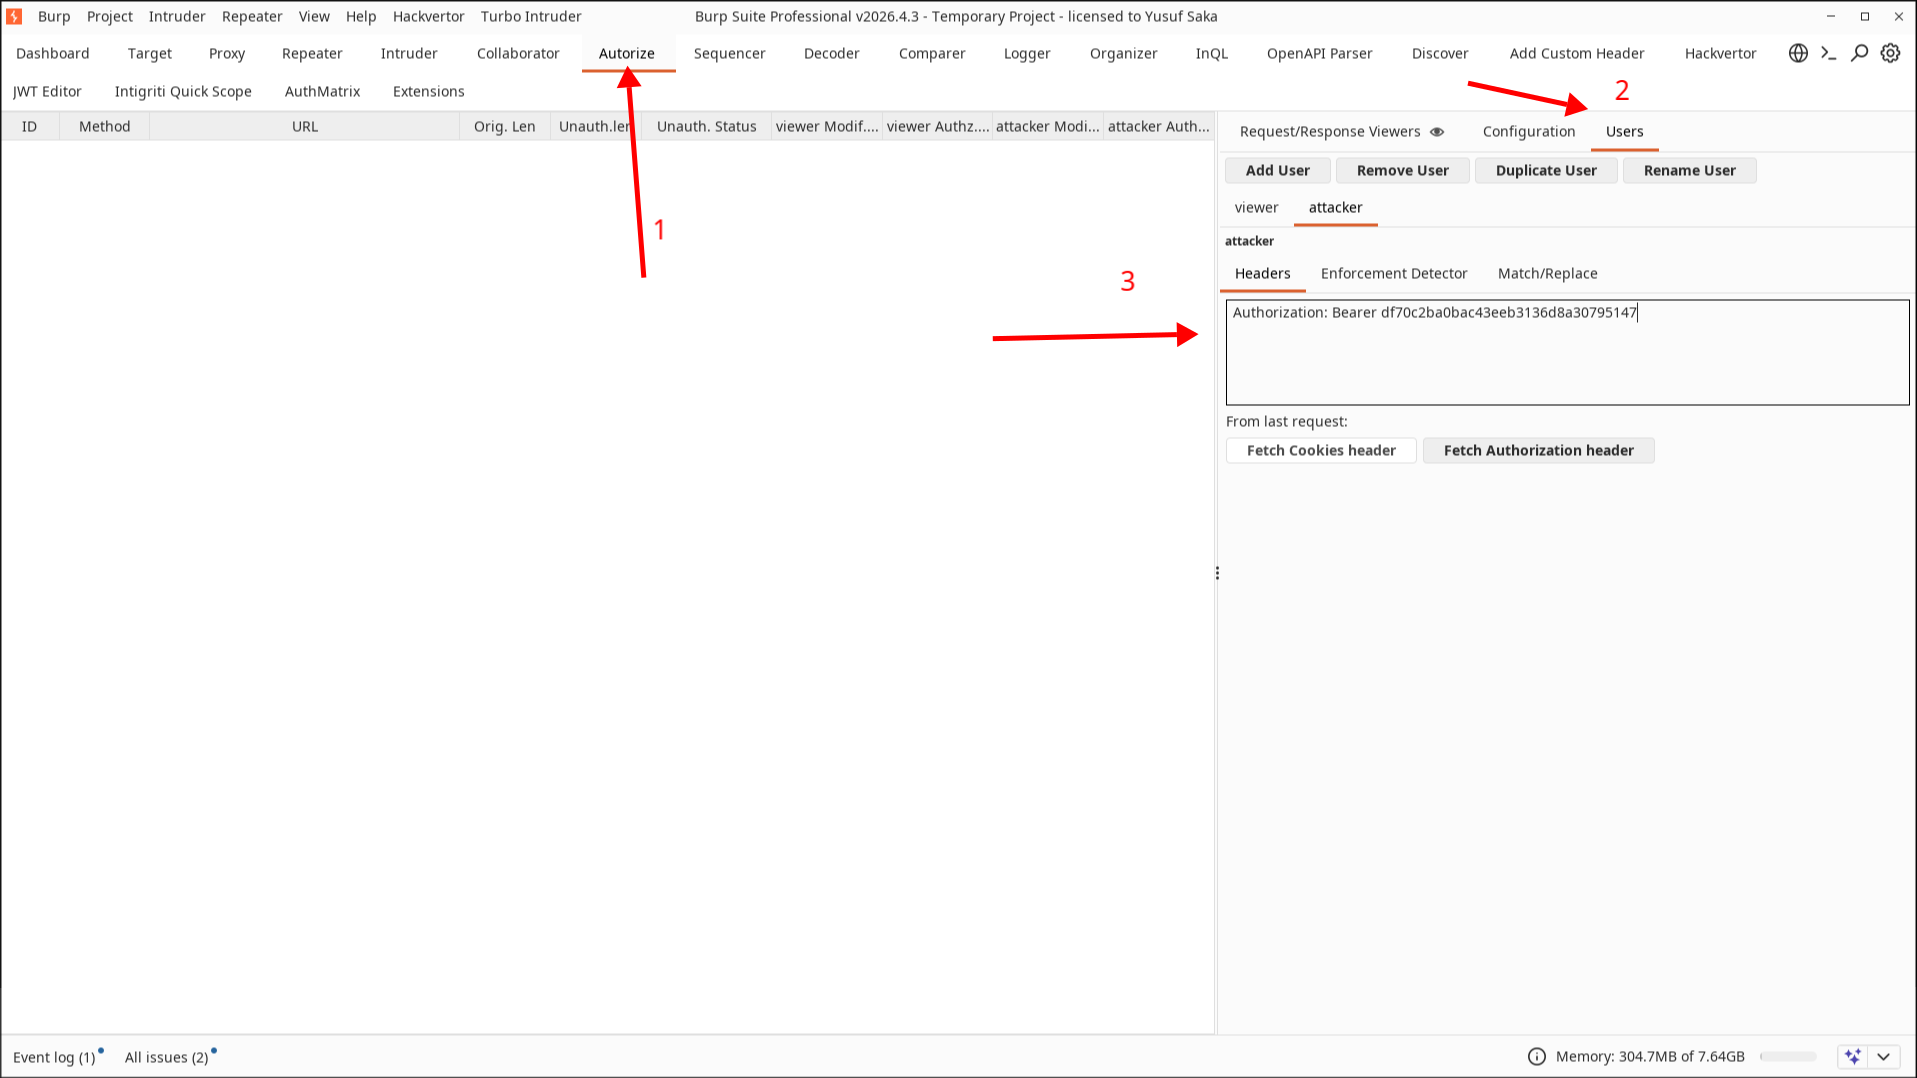
First we start by setting up the users under the Users tab. We add users called viewer and attacker, then we give them their corresponding bearer tokens under the Headers.
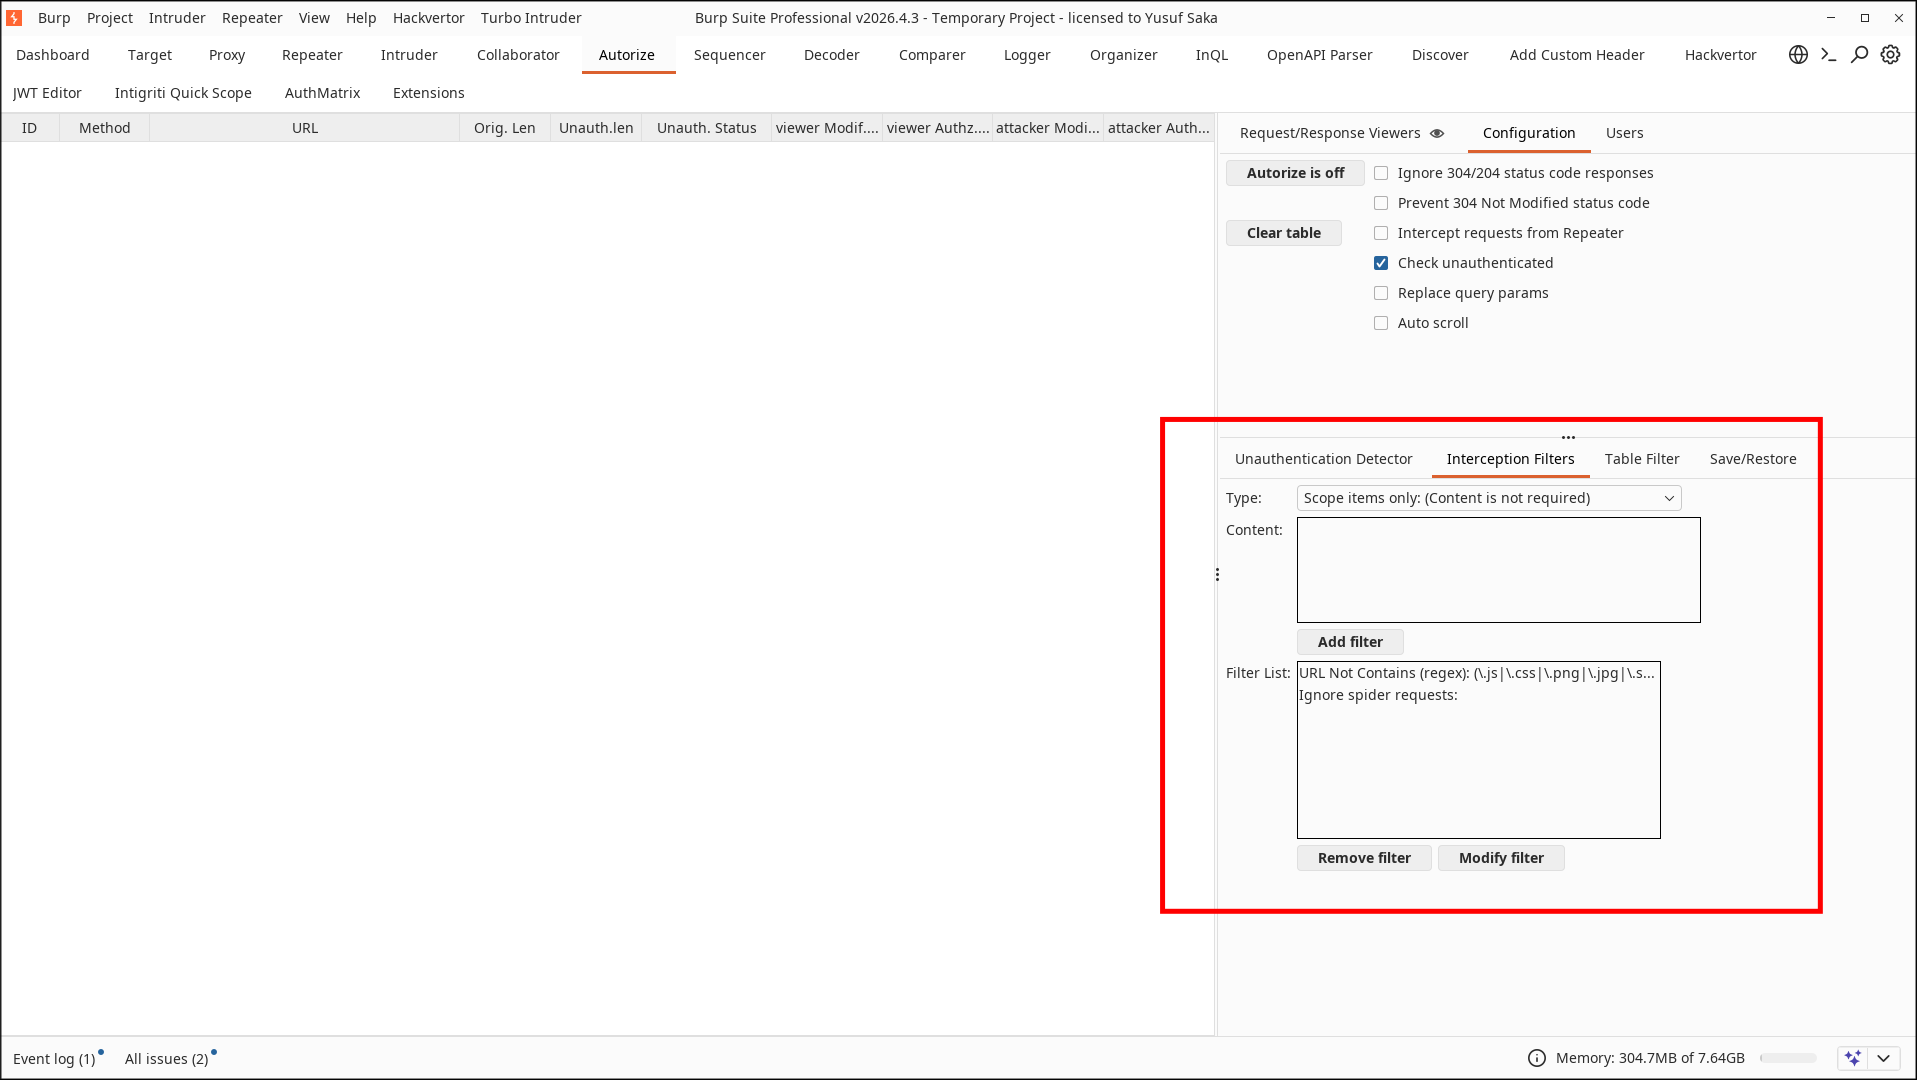
During real world testing, if I am dealing with big application where there are a lot of requests being transferred, I usually add filters to reduce the noise. It is not needed in this case, so I leave it empty.
Now we can simply click on, Autorize is off button to activate it.
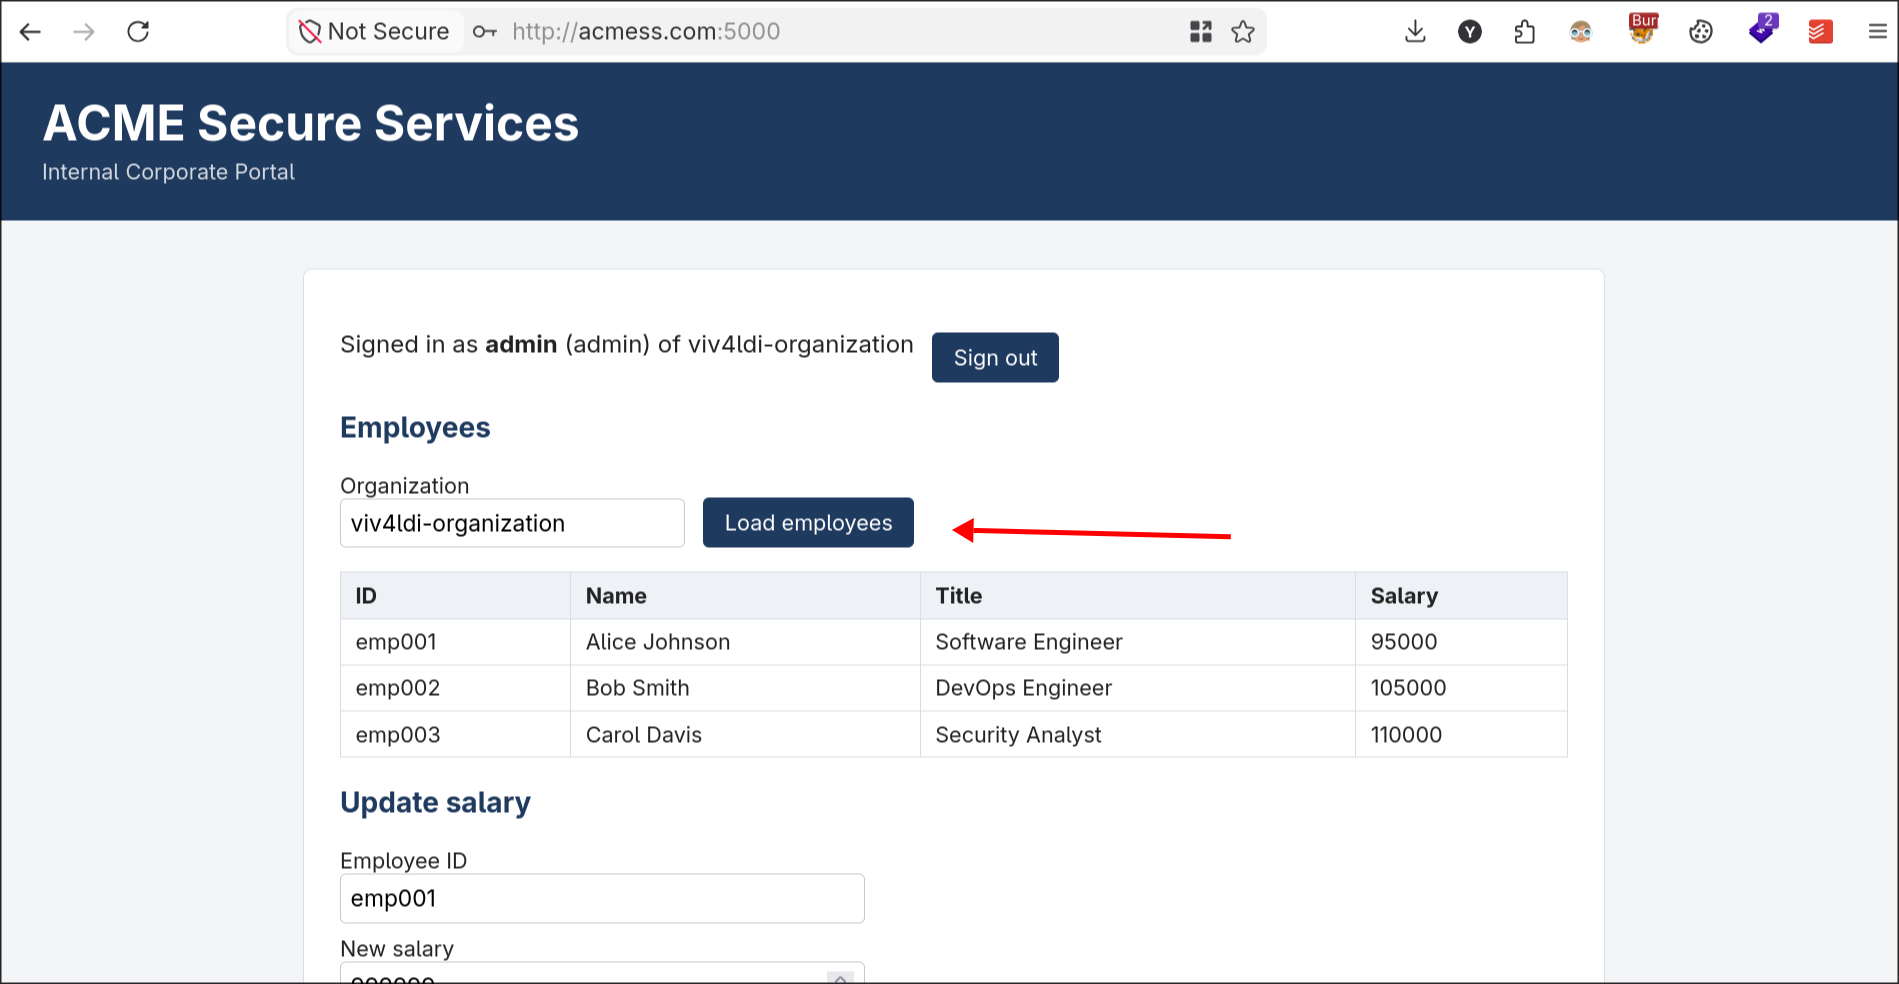
To start testing I simply click on Load employees on the Dashboard.
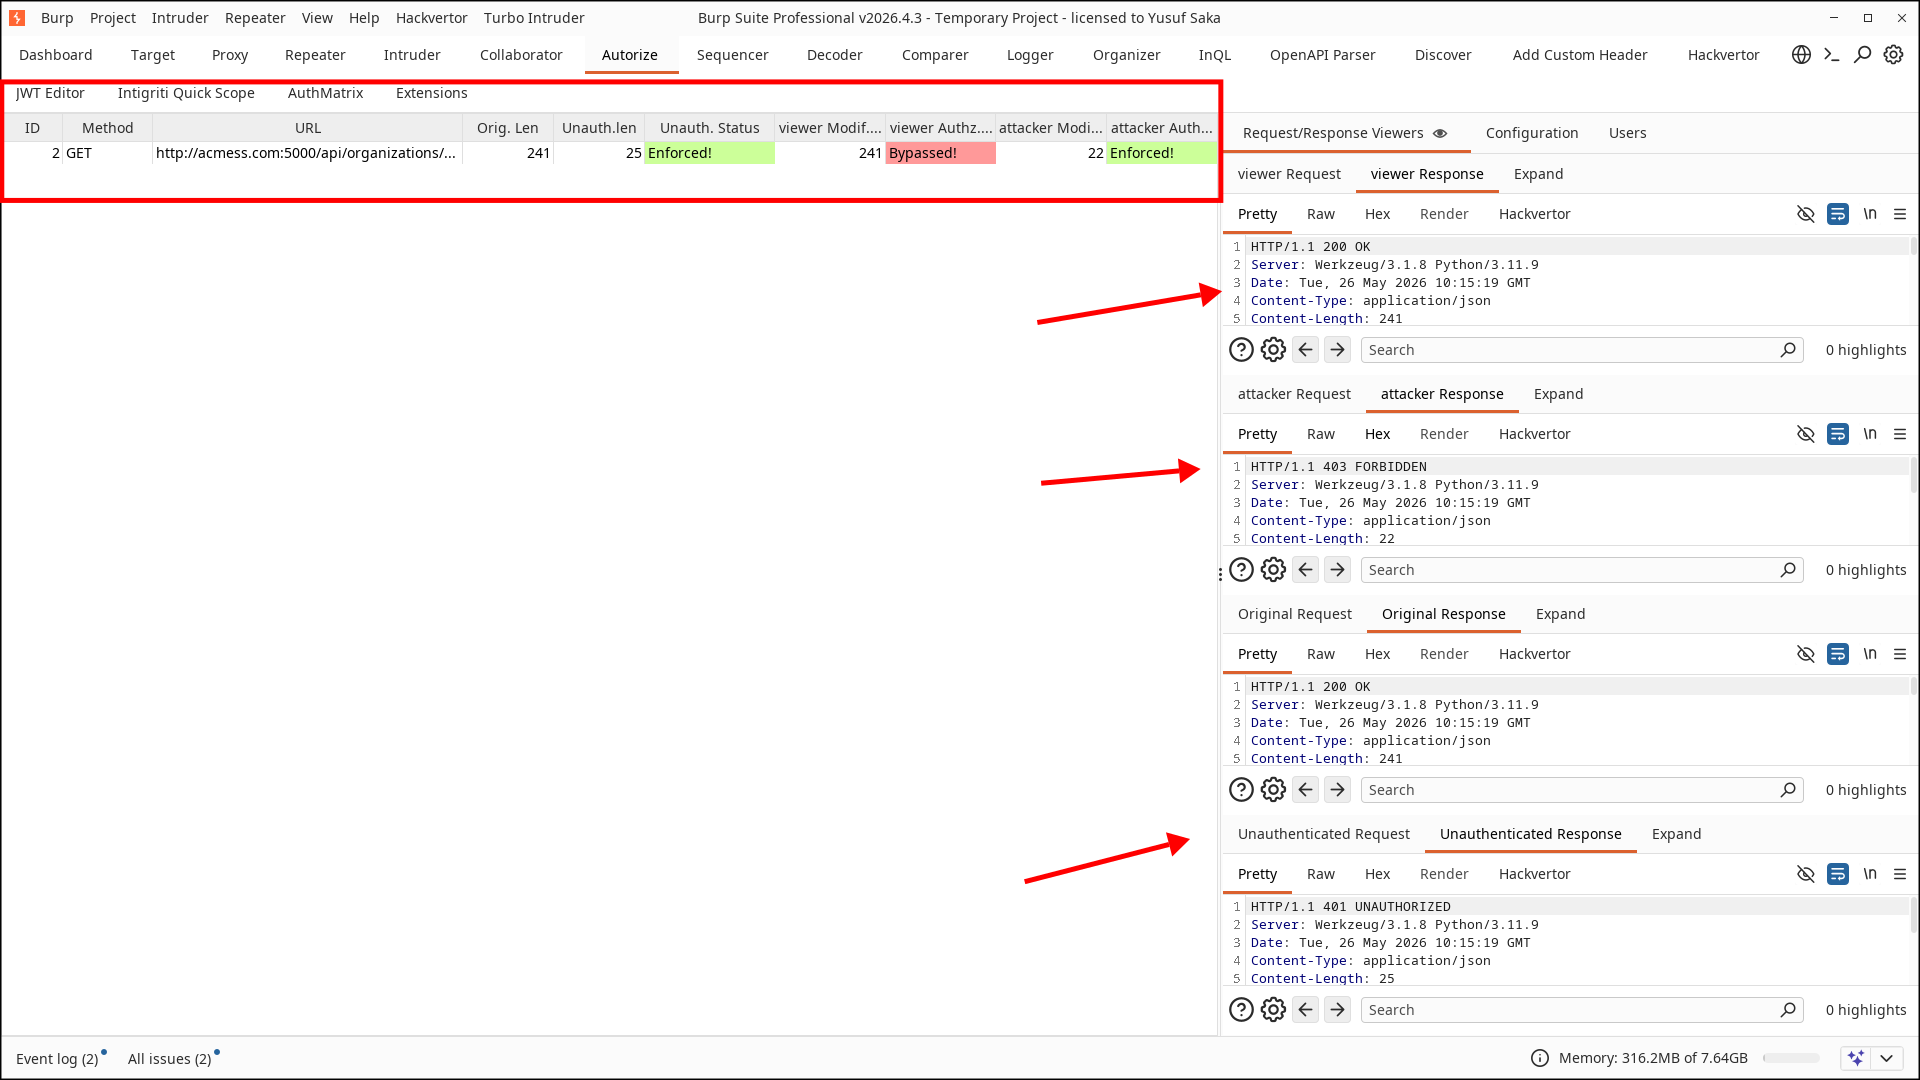
As we expected the attacker got 403 Forbidden, while the unauth user got 401 Unauthorized. The viewer got 200, and is indicated as bypassed, however this is expected since he has full read permissions within his organization.
Now we test the Project Creation feature, since both the attacker and the viewer should receive 403 Forbidden.
Looking at Autorize tab however, we see that is not the case.
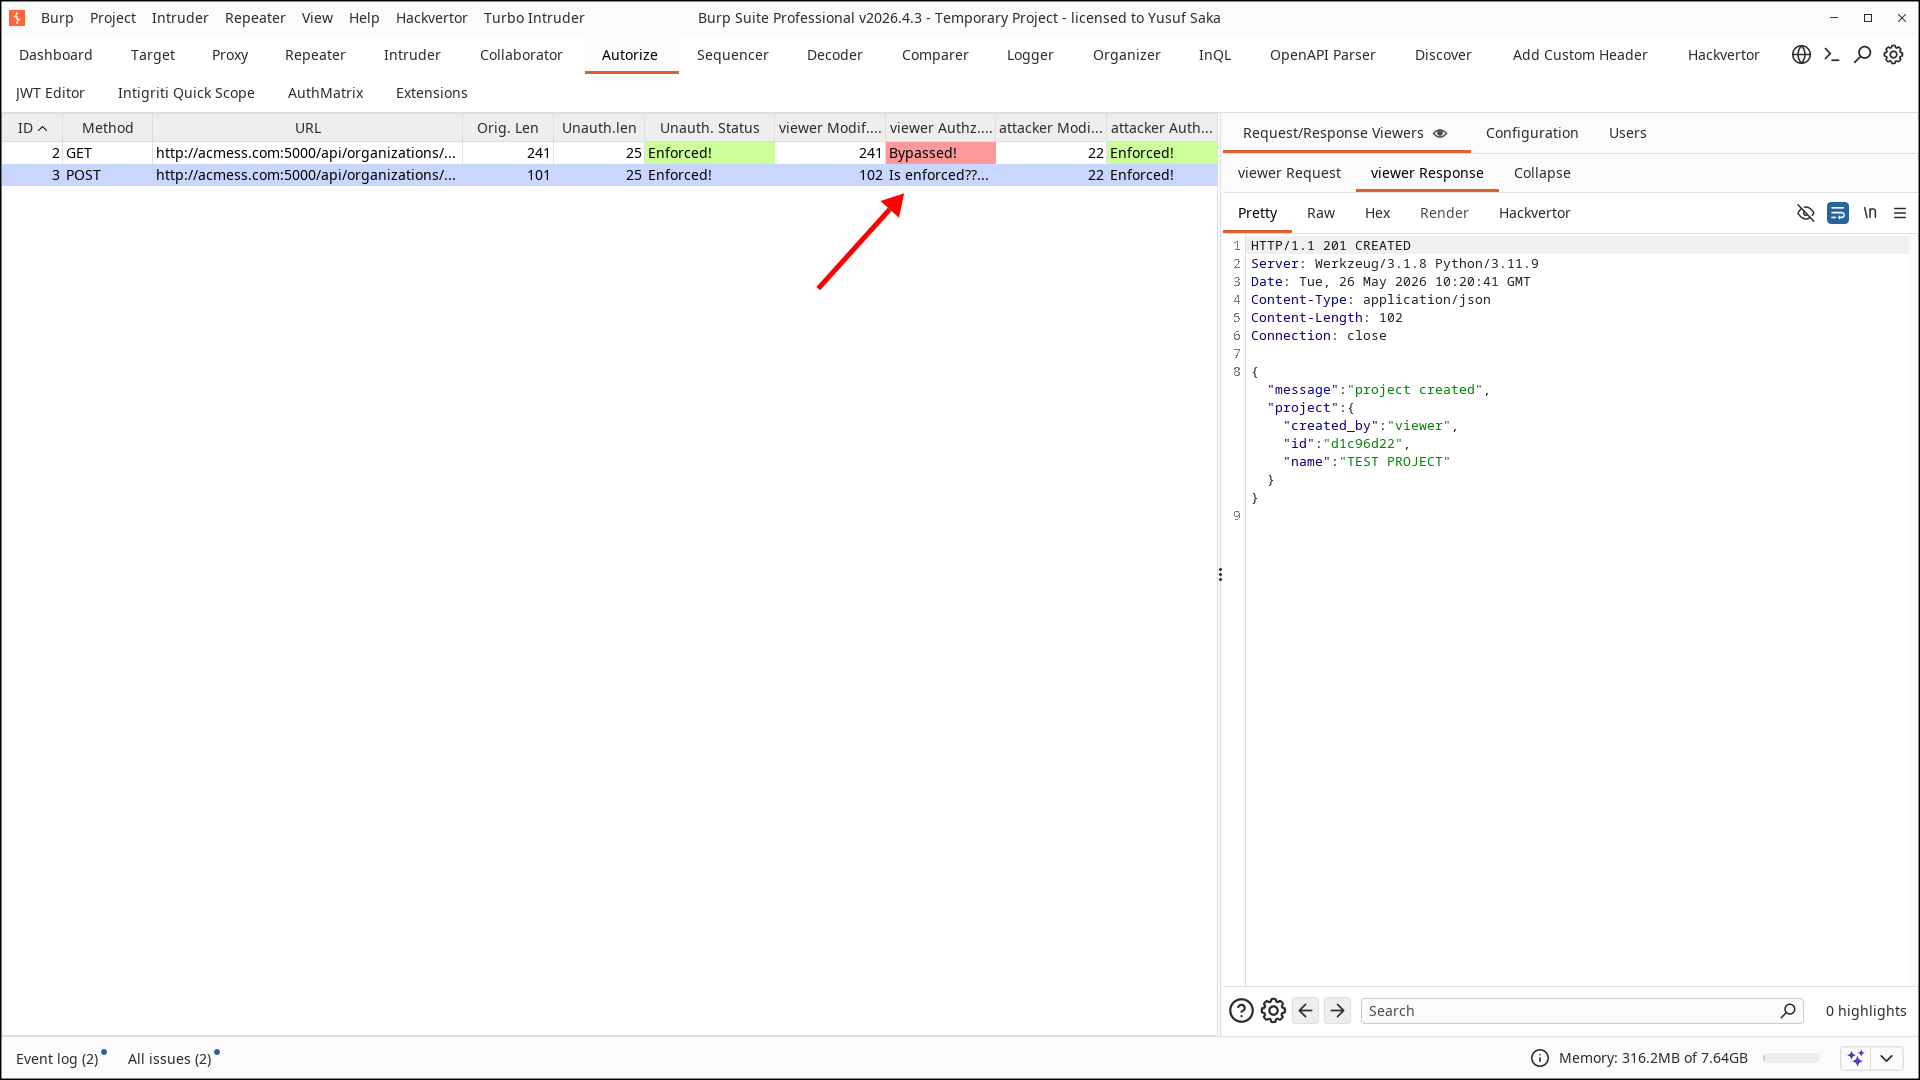 We can see that both
 Unauthenticated and the attacker request got rejected, however the viewer successfully created the Project even though he was supposed to not.
You will see that it shows Is Enforced? instead of Bypassed. The reason for that is that, even though it did not get rejected, the response was not completely the same as the original request (the one we did as the admin using the browser). This is because the id that is assigned to the created Project was not the same for both the original request and the replayed request.
Is Enforced? does not necessarily mean it is not vulnerable. It just means, manual check is required.
For the next one, we will check the Update Salary feature, and try to assign our friend Alice Johnson a very generous amount.
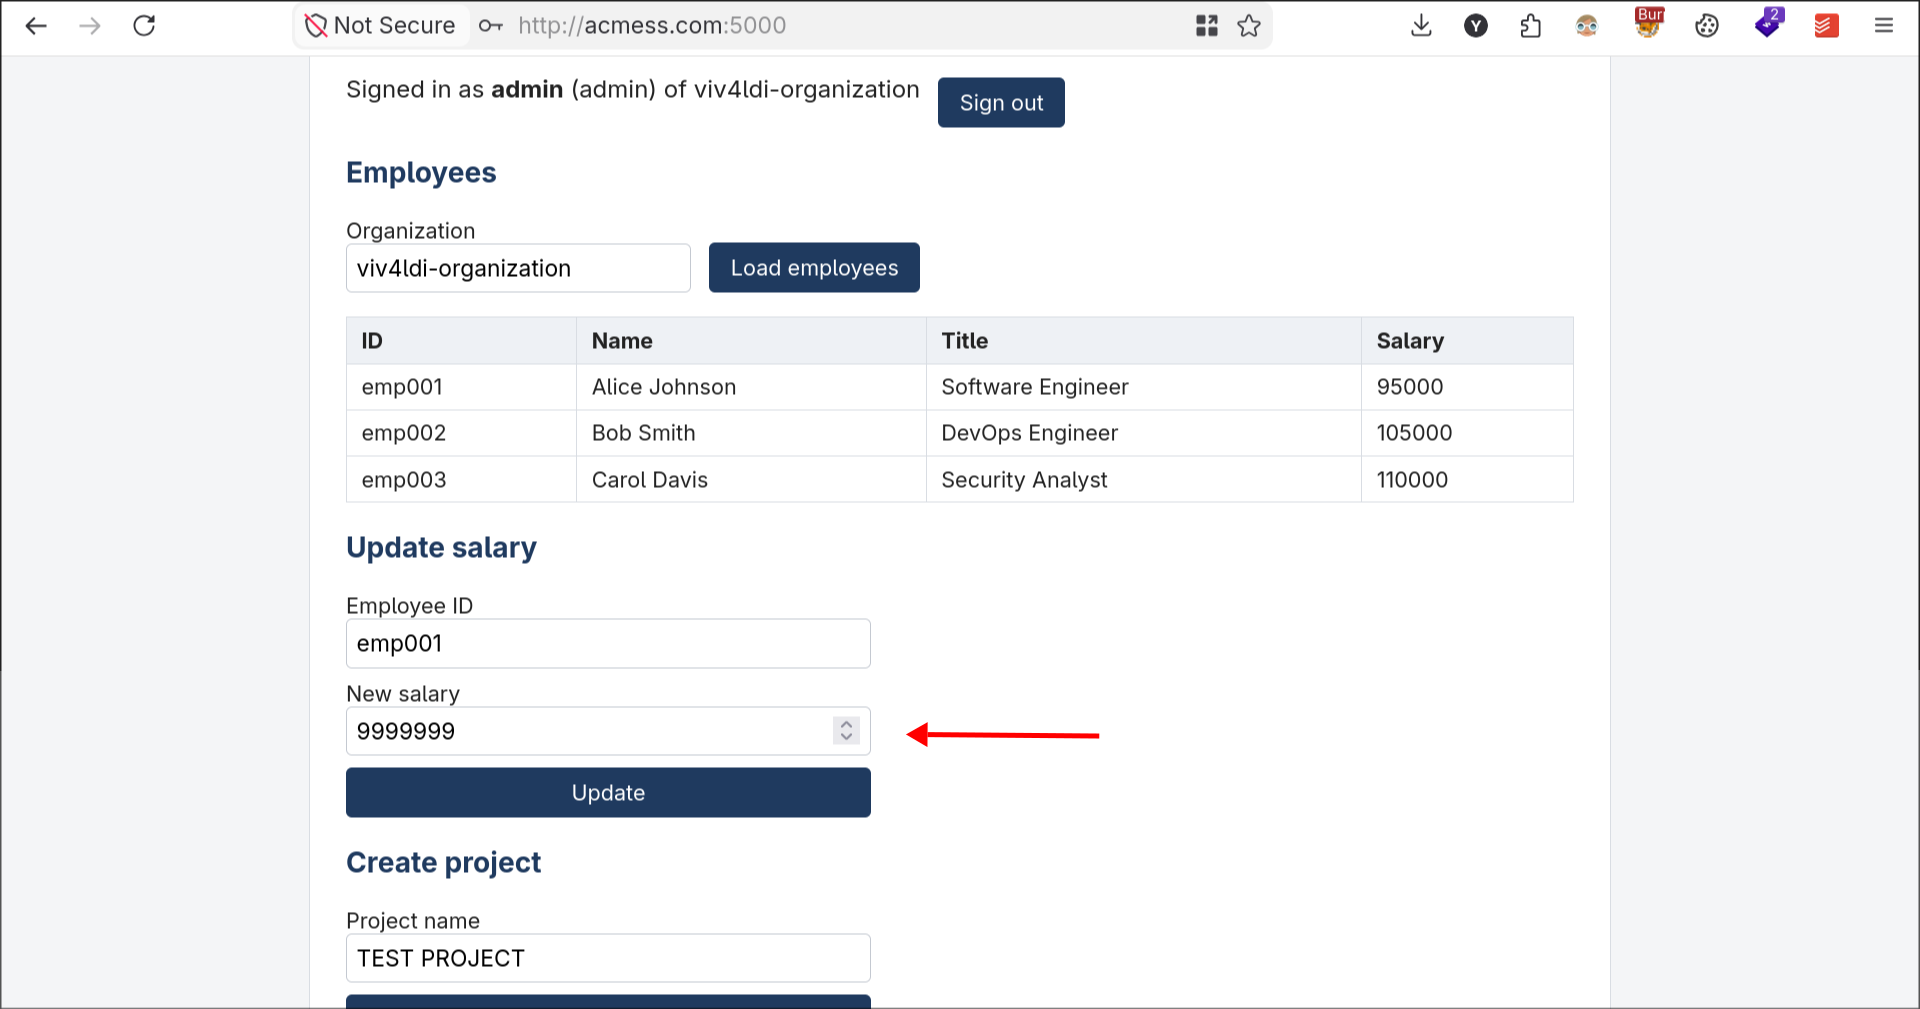
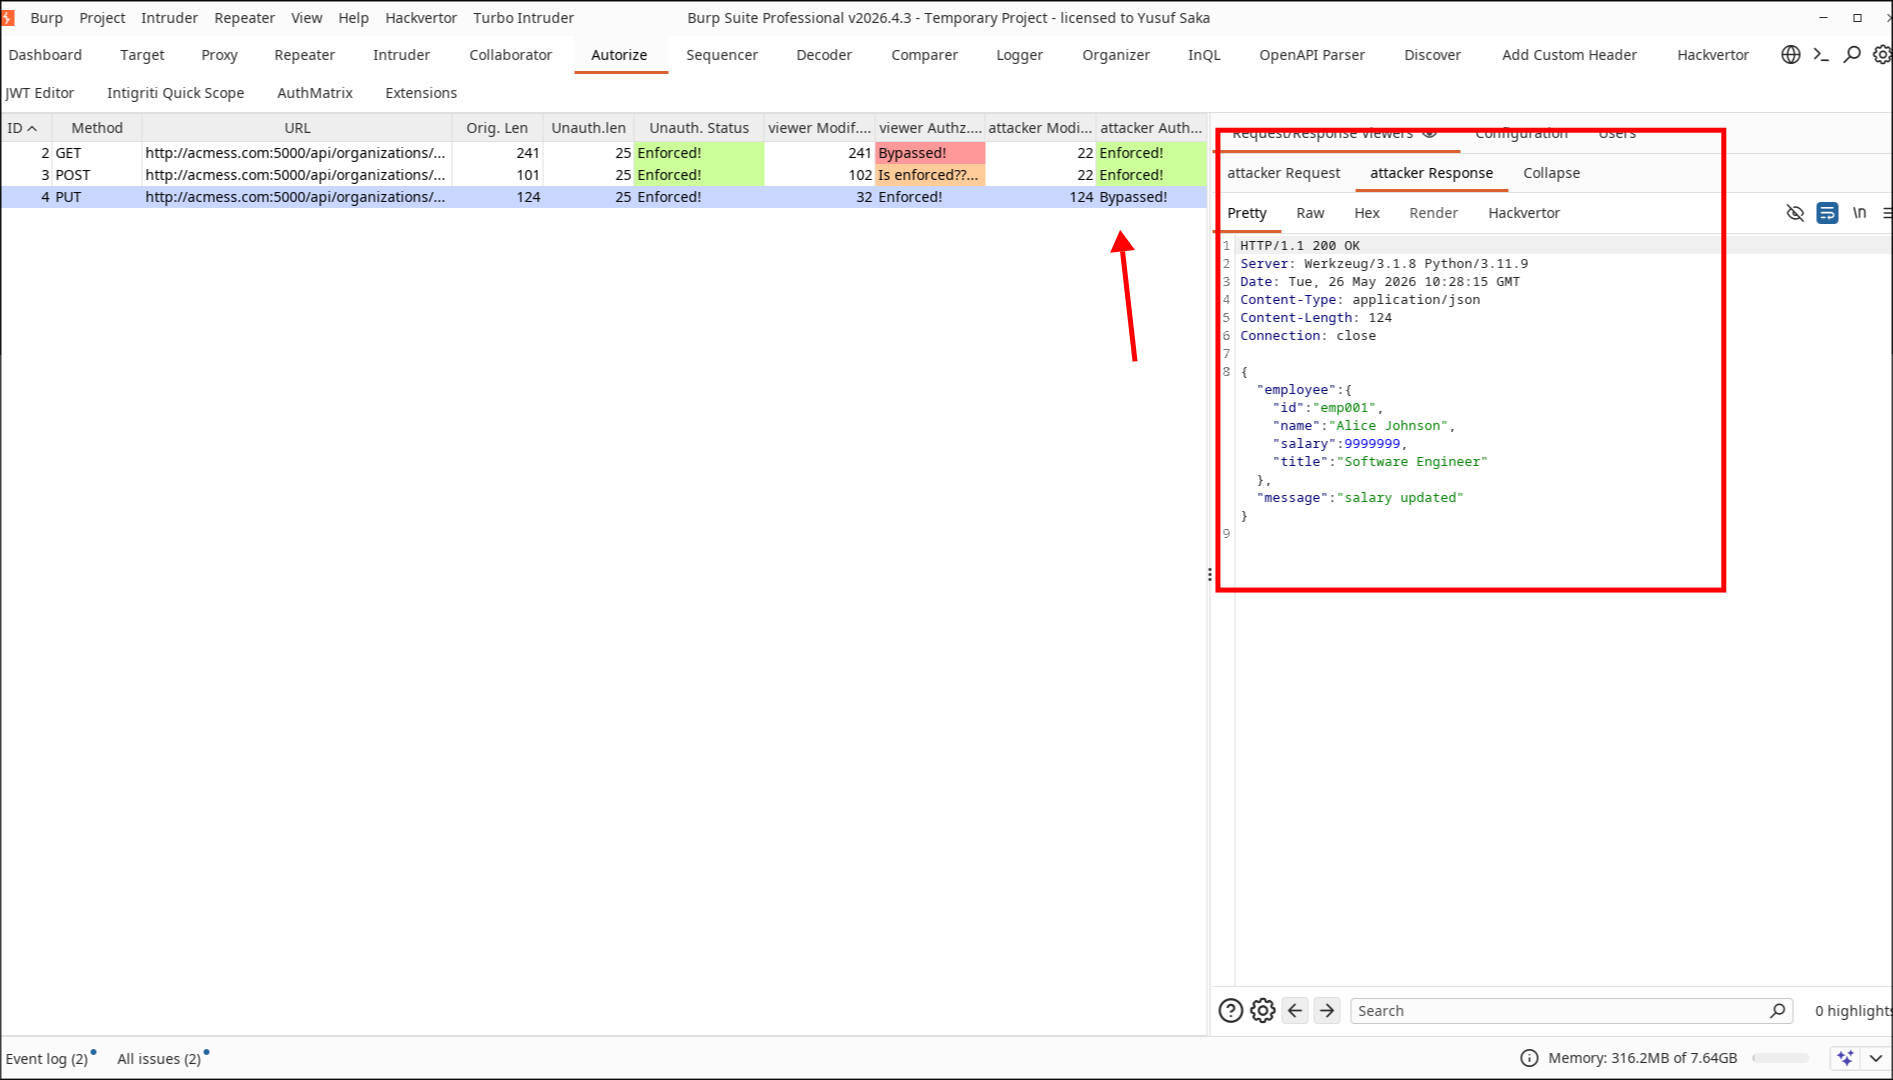
Looking back at our Autorize, we can see that this time both Unauthenticated and the viewer request got rejected, however the attacker request got successfully replayed. This means, a person that is part of another organization may play with the salary values of the organization that he is not part of.
For the final test we test the Check backup status feature. There are often cases where the backend may accept the requests if there is no authentication token at all.
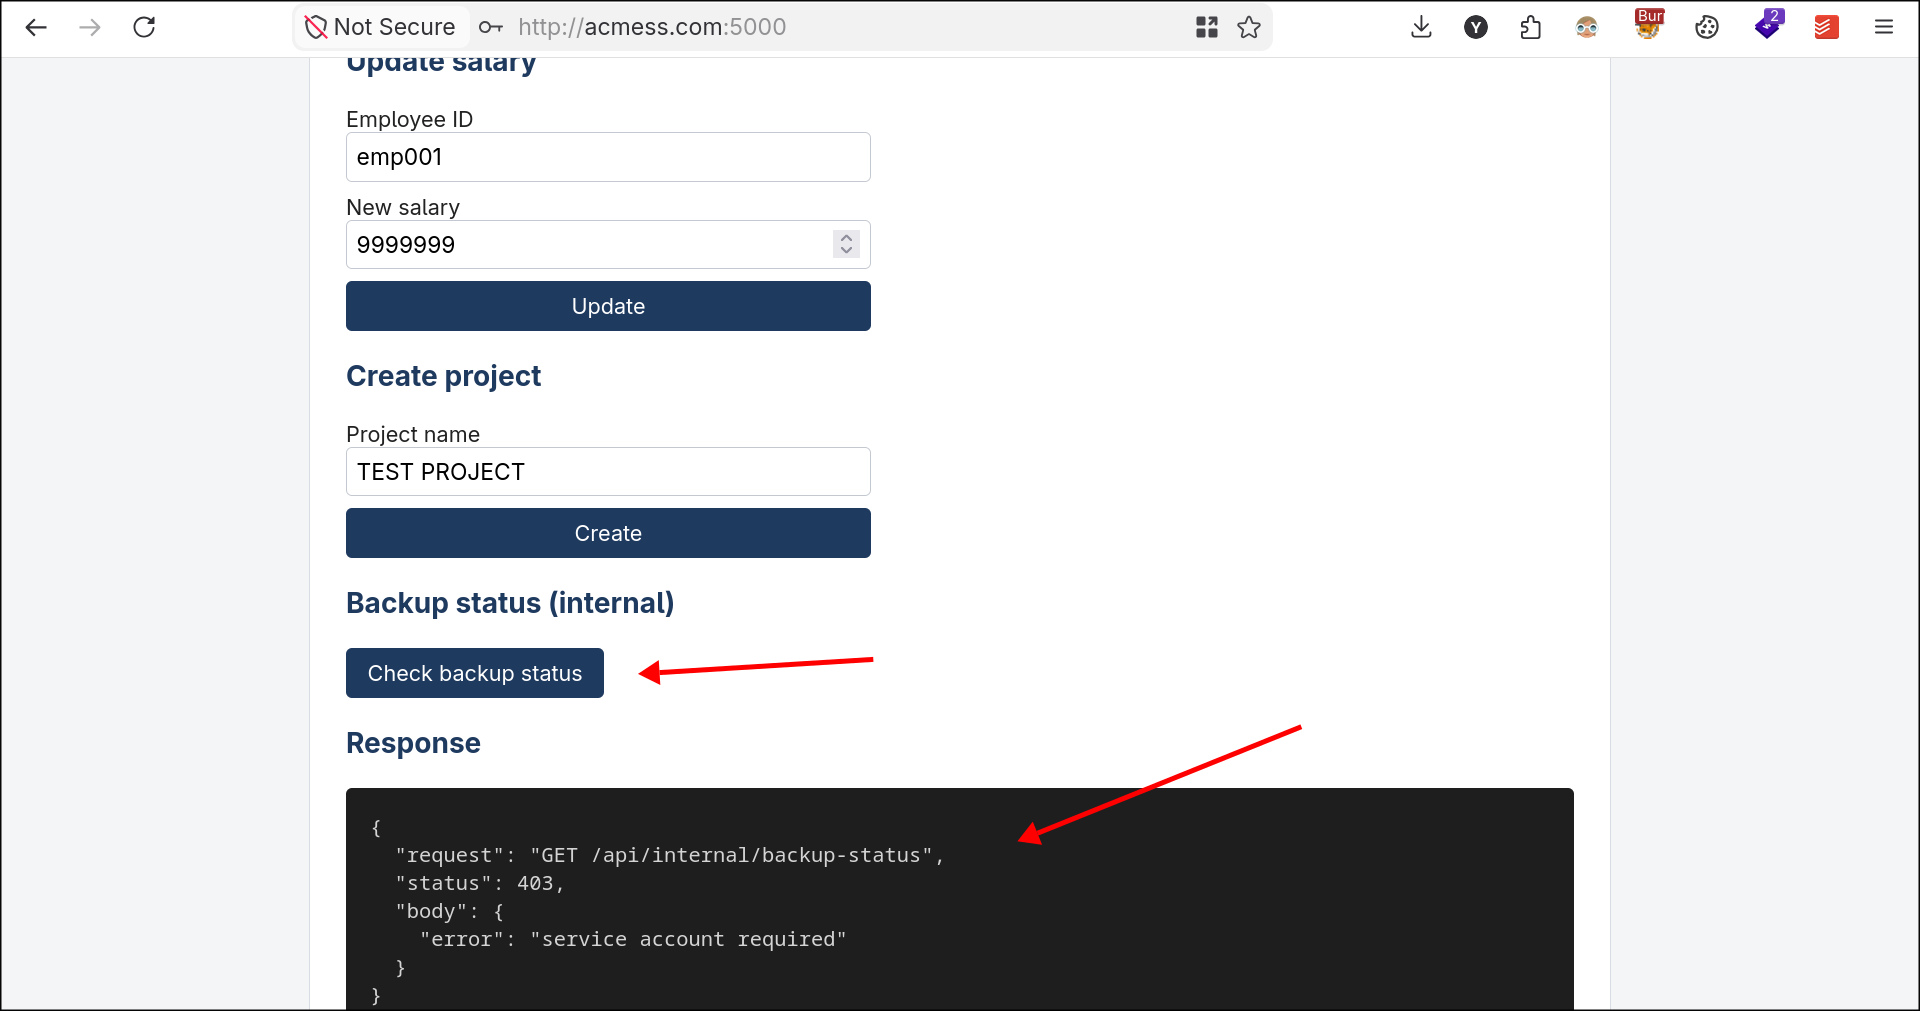
Once clicking we get an error 403, saying that a service account is required. It is always a good idea to try sending the same request with no authentication token at all, to see if there are some broken authentication bugs in the backend. Thanks to Autorize this is handled automatically unless you don’t want to.
Looking back to the Autorize tab we see that we had Bypassed for both attacker and viewer. Don’t let this behaviour fool you, because the reason that happened is that the original request (admin) got a 403 as well.
Looking at the Unauthenticated request however, we see we successfully bypassed security measures.

JWT Editor
As testers you will see JSON Web Tokens (JWT) a lot in your career. Though it is quite easy and simple to secure this functionality, one simple mistake will be catastrophic since it handles both authentication and authorization.
Thanks to the JWT Editor extension, you can easily perform certain tests in regards to JSON Web Tokens.
- It has a top-level JWT Editor tab for managing cryptographic keys, persistent storage of tokens and extension settings.
- Custom JSON Web Token tab within HTTP message editors for viewing and modifying JWTs.
- It automatically detects existence of JWTs and highlights them in green.
- It supports signing, verifying, encrypting and decrypting JWTs using stored keys.
- Has support for a range of common attacks on JWS.
So basically it is your all-in-one swiss-knife for JWT security.
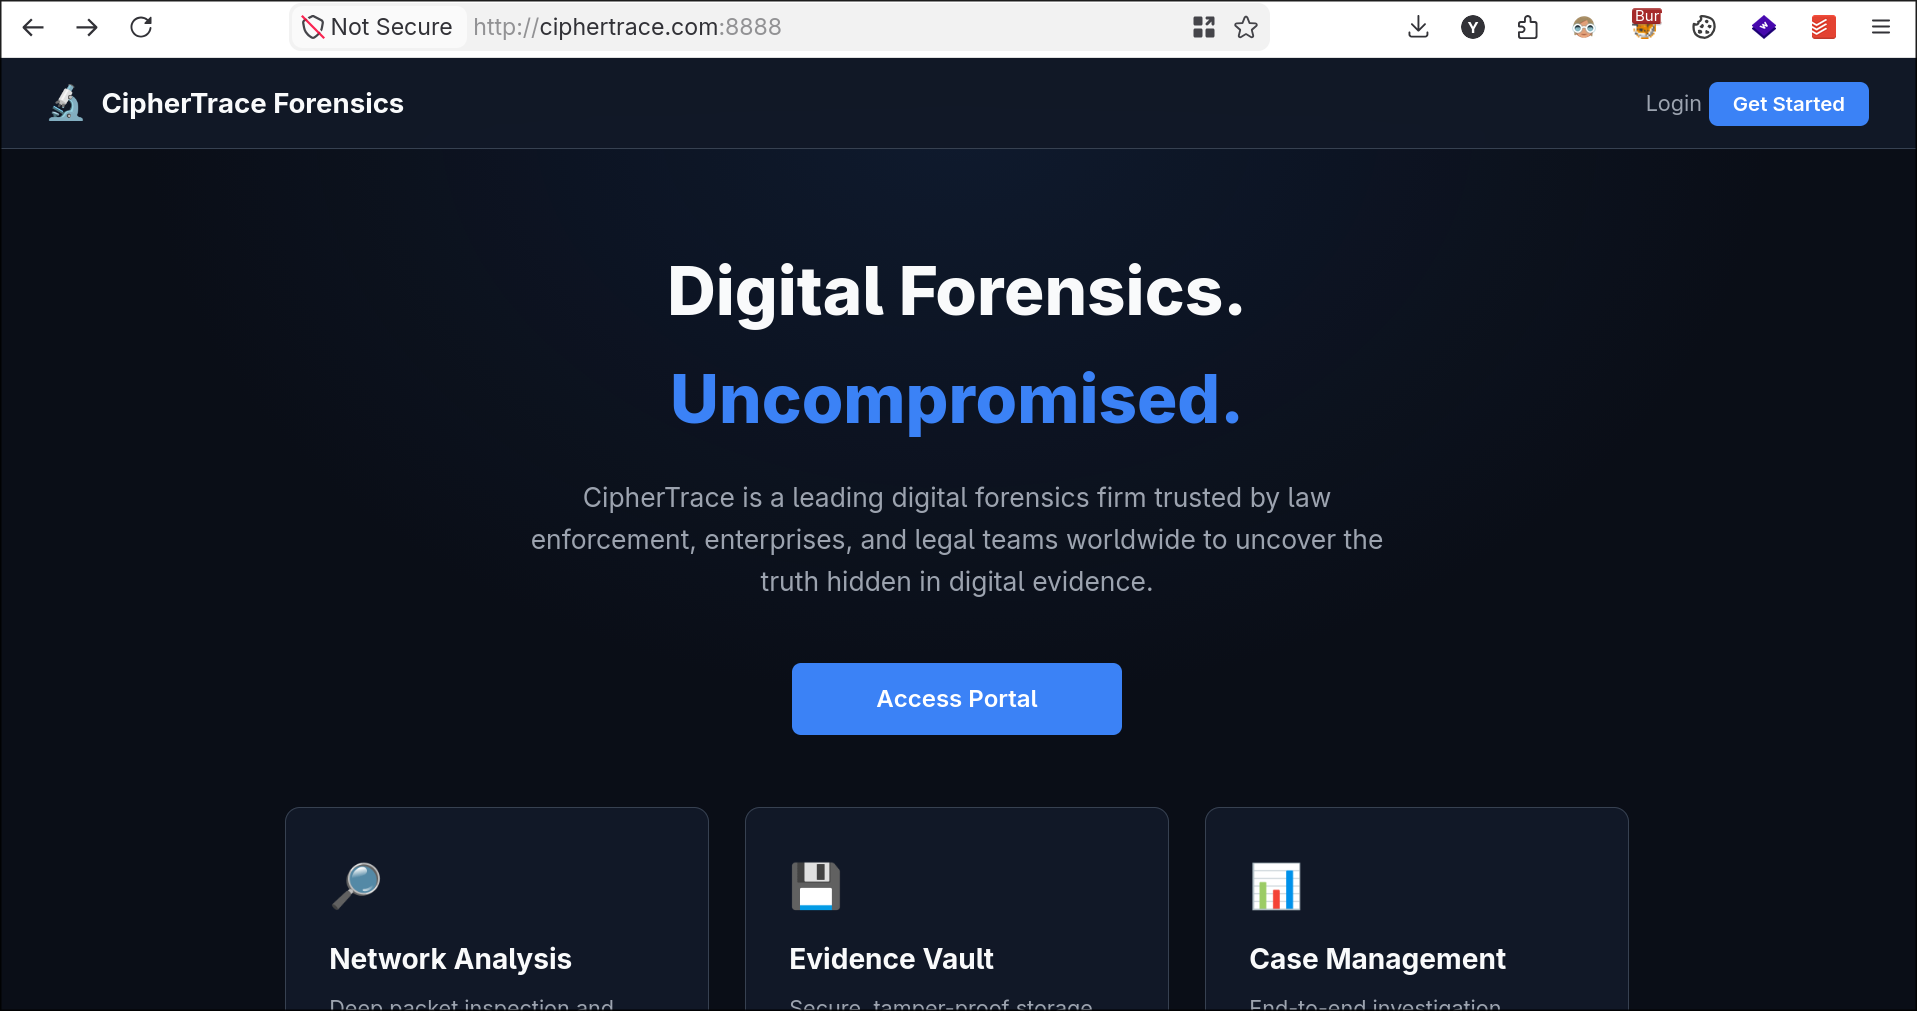
To showcase some of JWT Editor’s functionalities I will use a CTF challenge me and my team cryptflow created, that is called Cipher Trace.
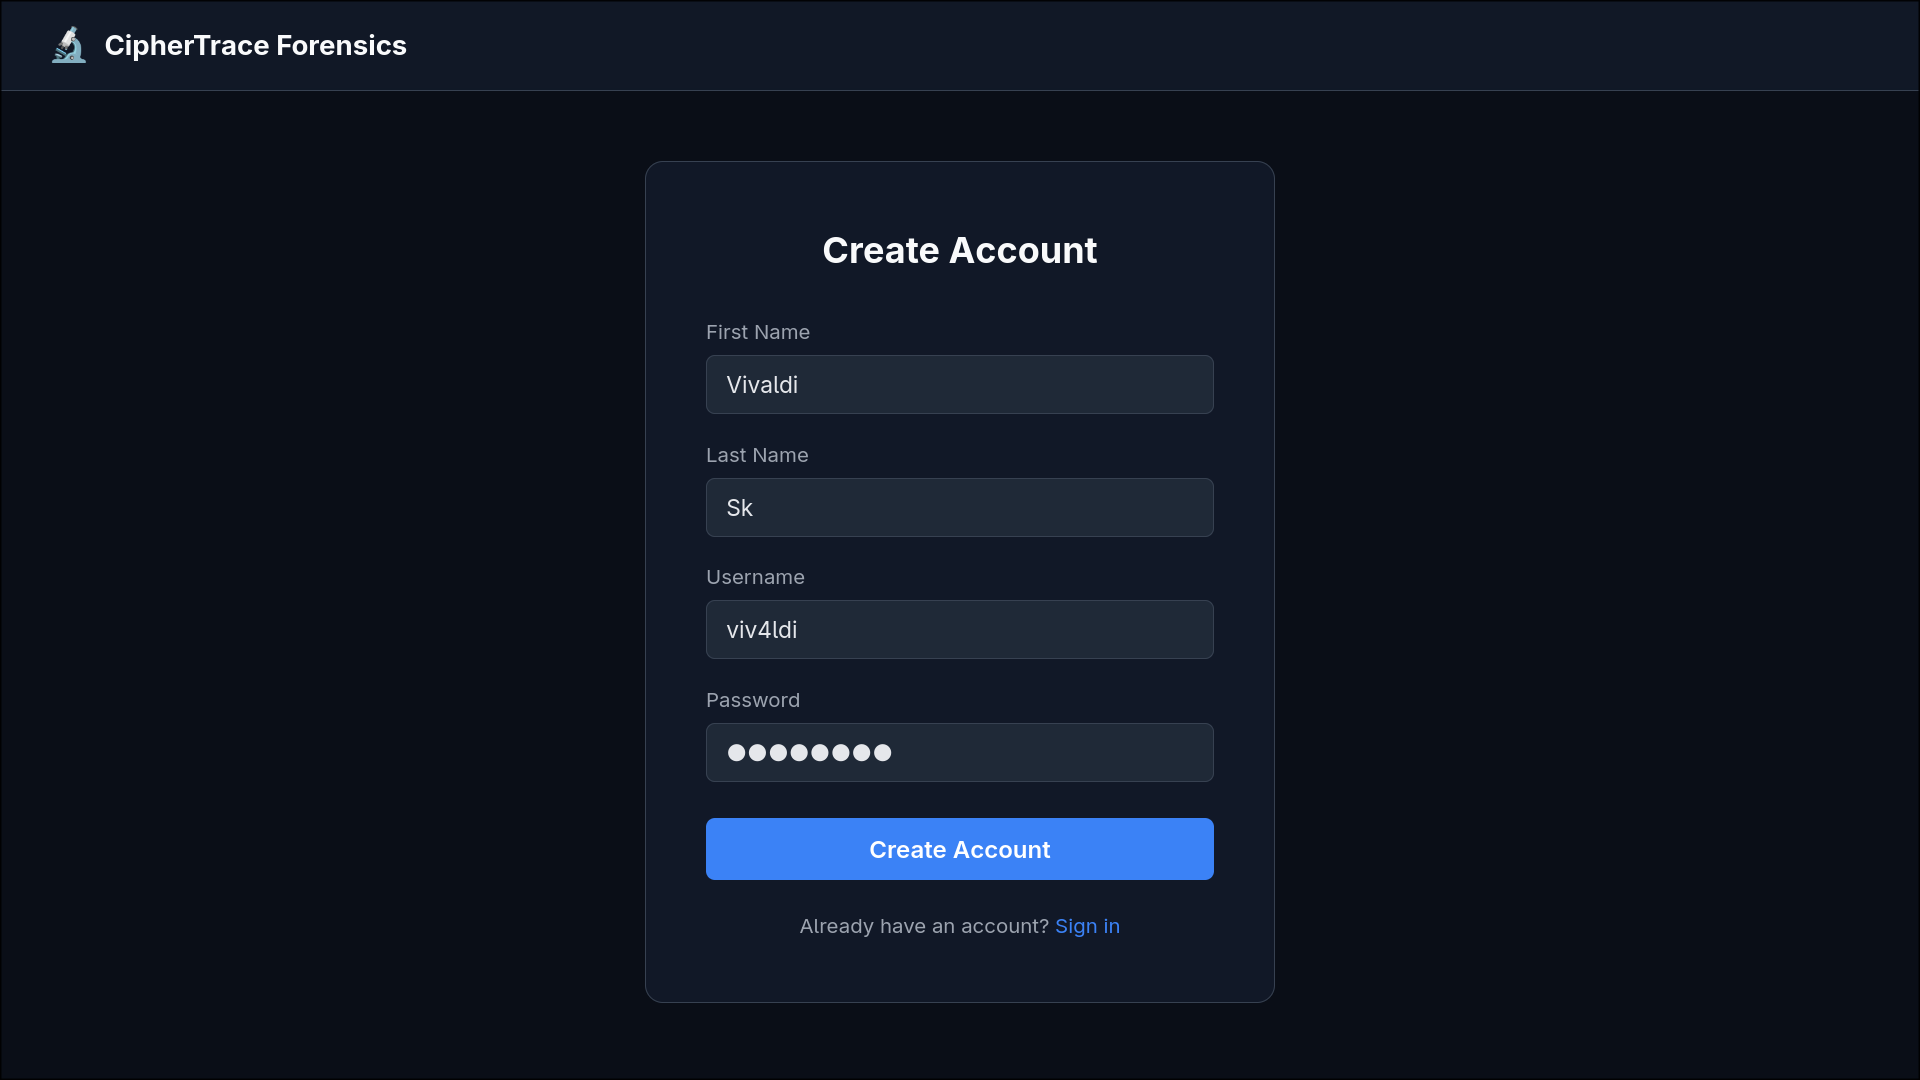
After creating an account one can see that the backend uses JWT tokens as highlighted in the Burp Proxy tab.
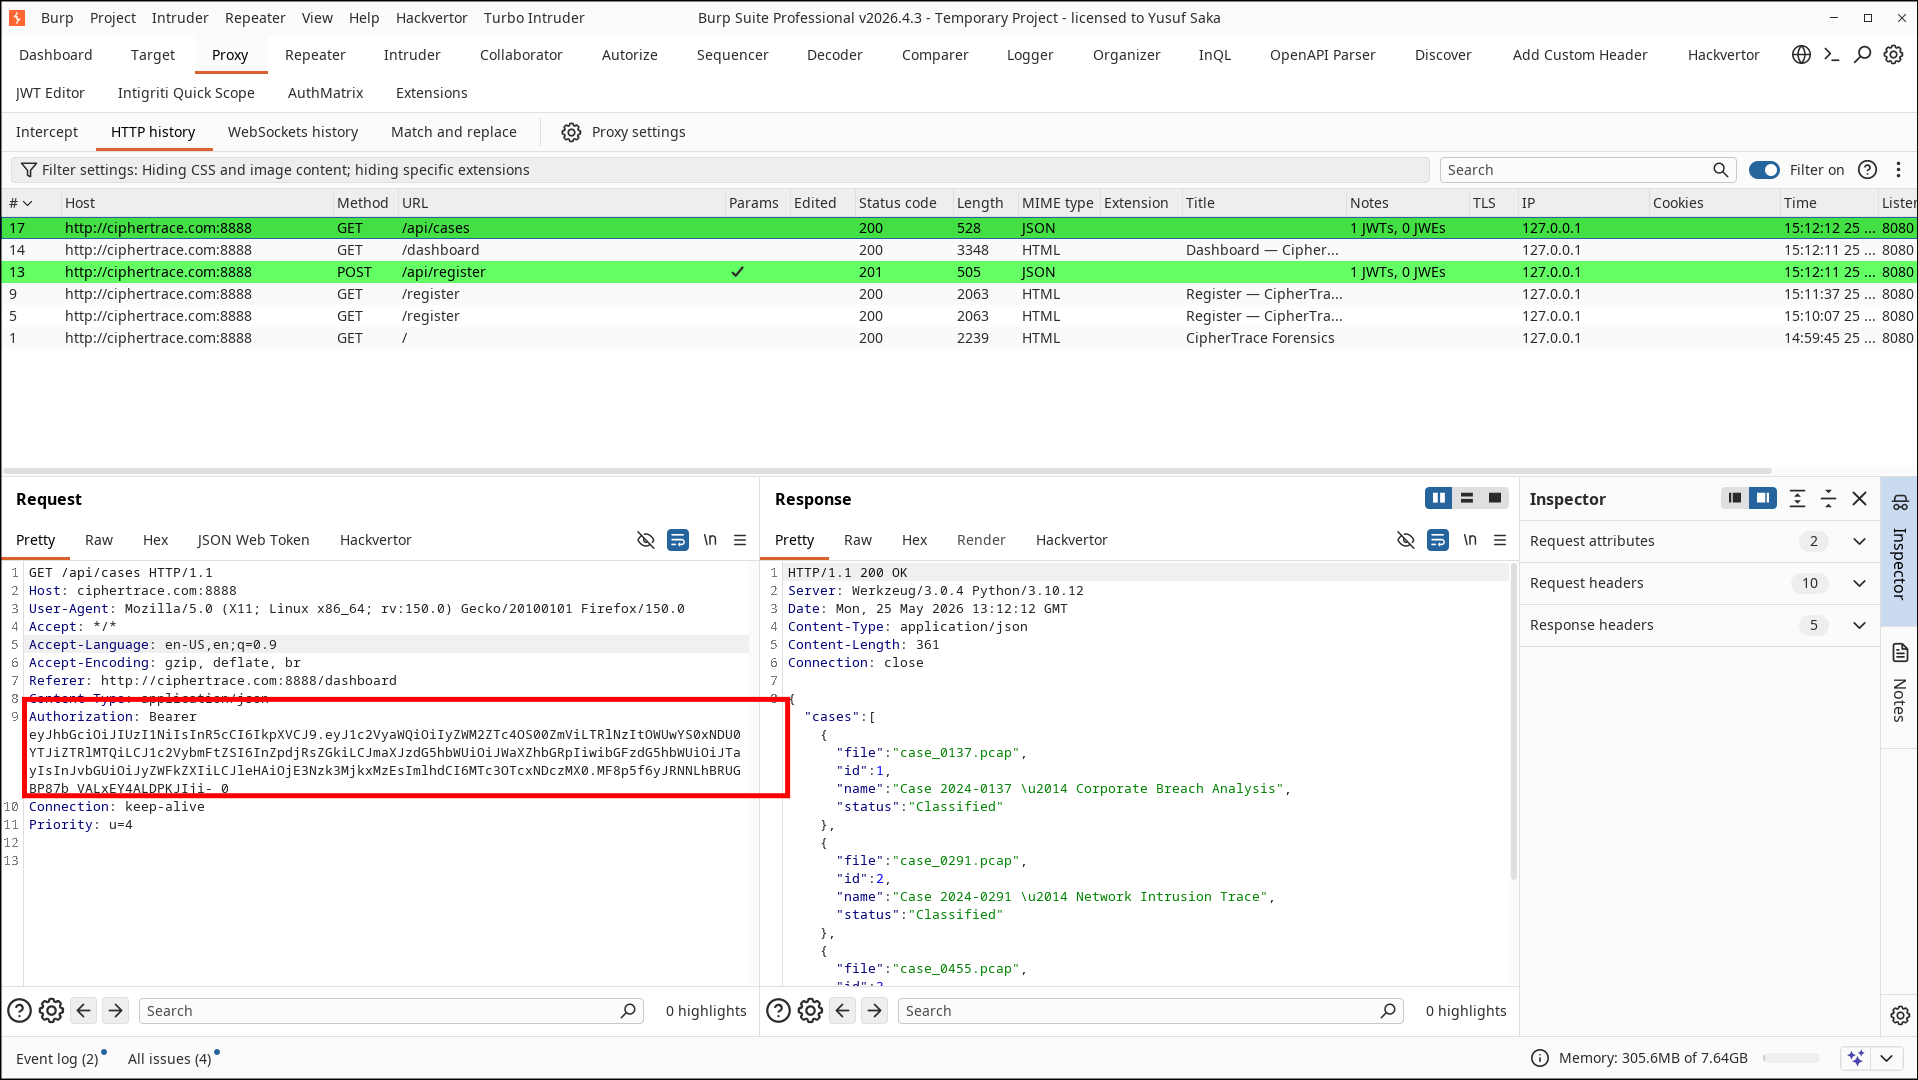
Looking at the /api/cases endpoint we see there are some sensitive documents that are marked as classified, and is not accessible by a user with our privileges.
Looking at the JSON Web Token tab in one of the HTTP requests, we can find out useful information about the contents of the JWS we are dealing with.
Below image shows which algorithm is in use, what does the payload contain etc.
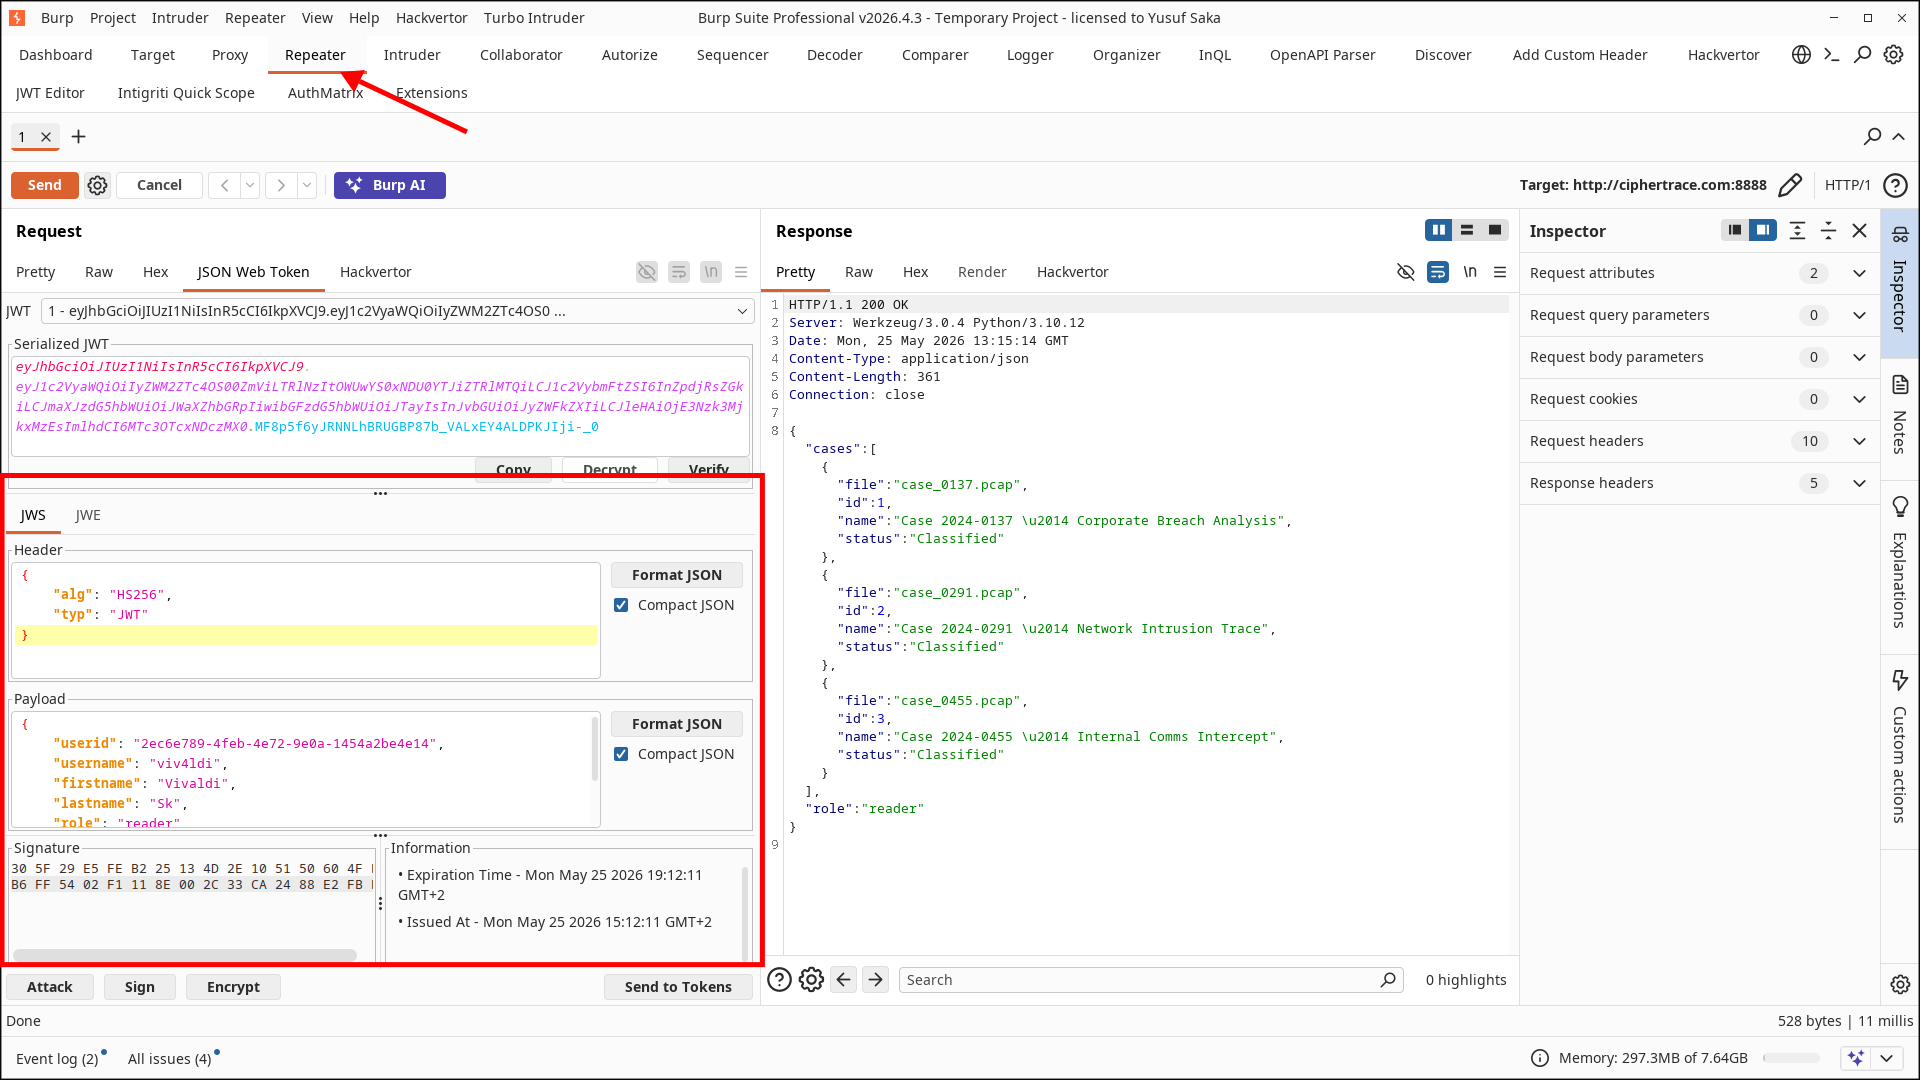
The key role specifically stands out since that is probably how the backend determines the permissions that the user possesses.
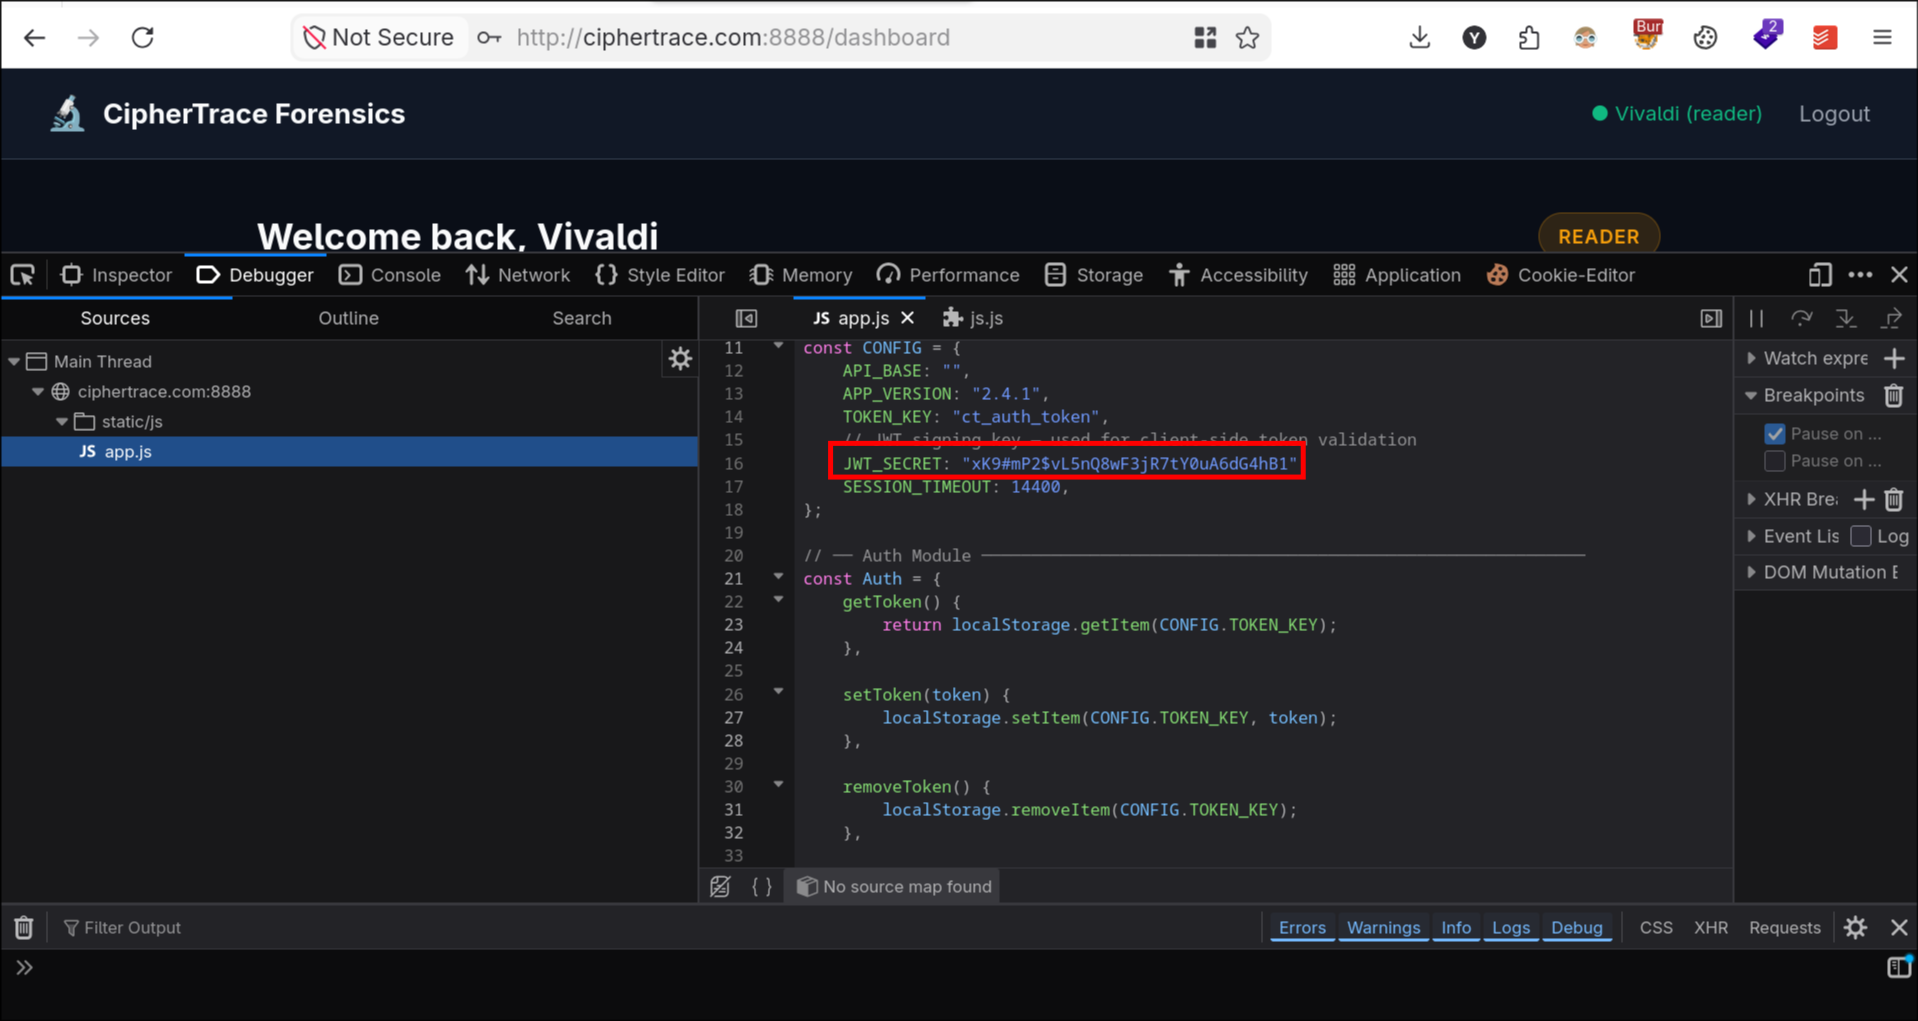
Going through the JavaScript files, we see the leakage of the JWT secret that is used to sign the tokens.
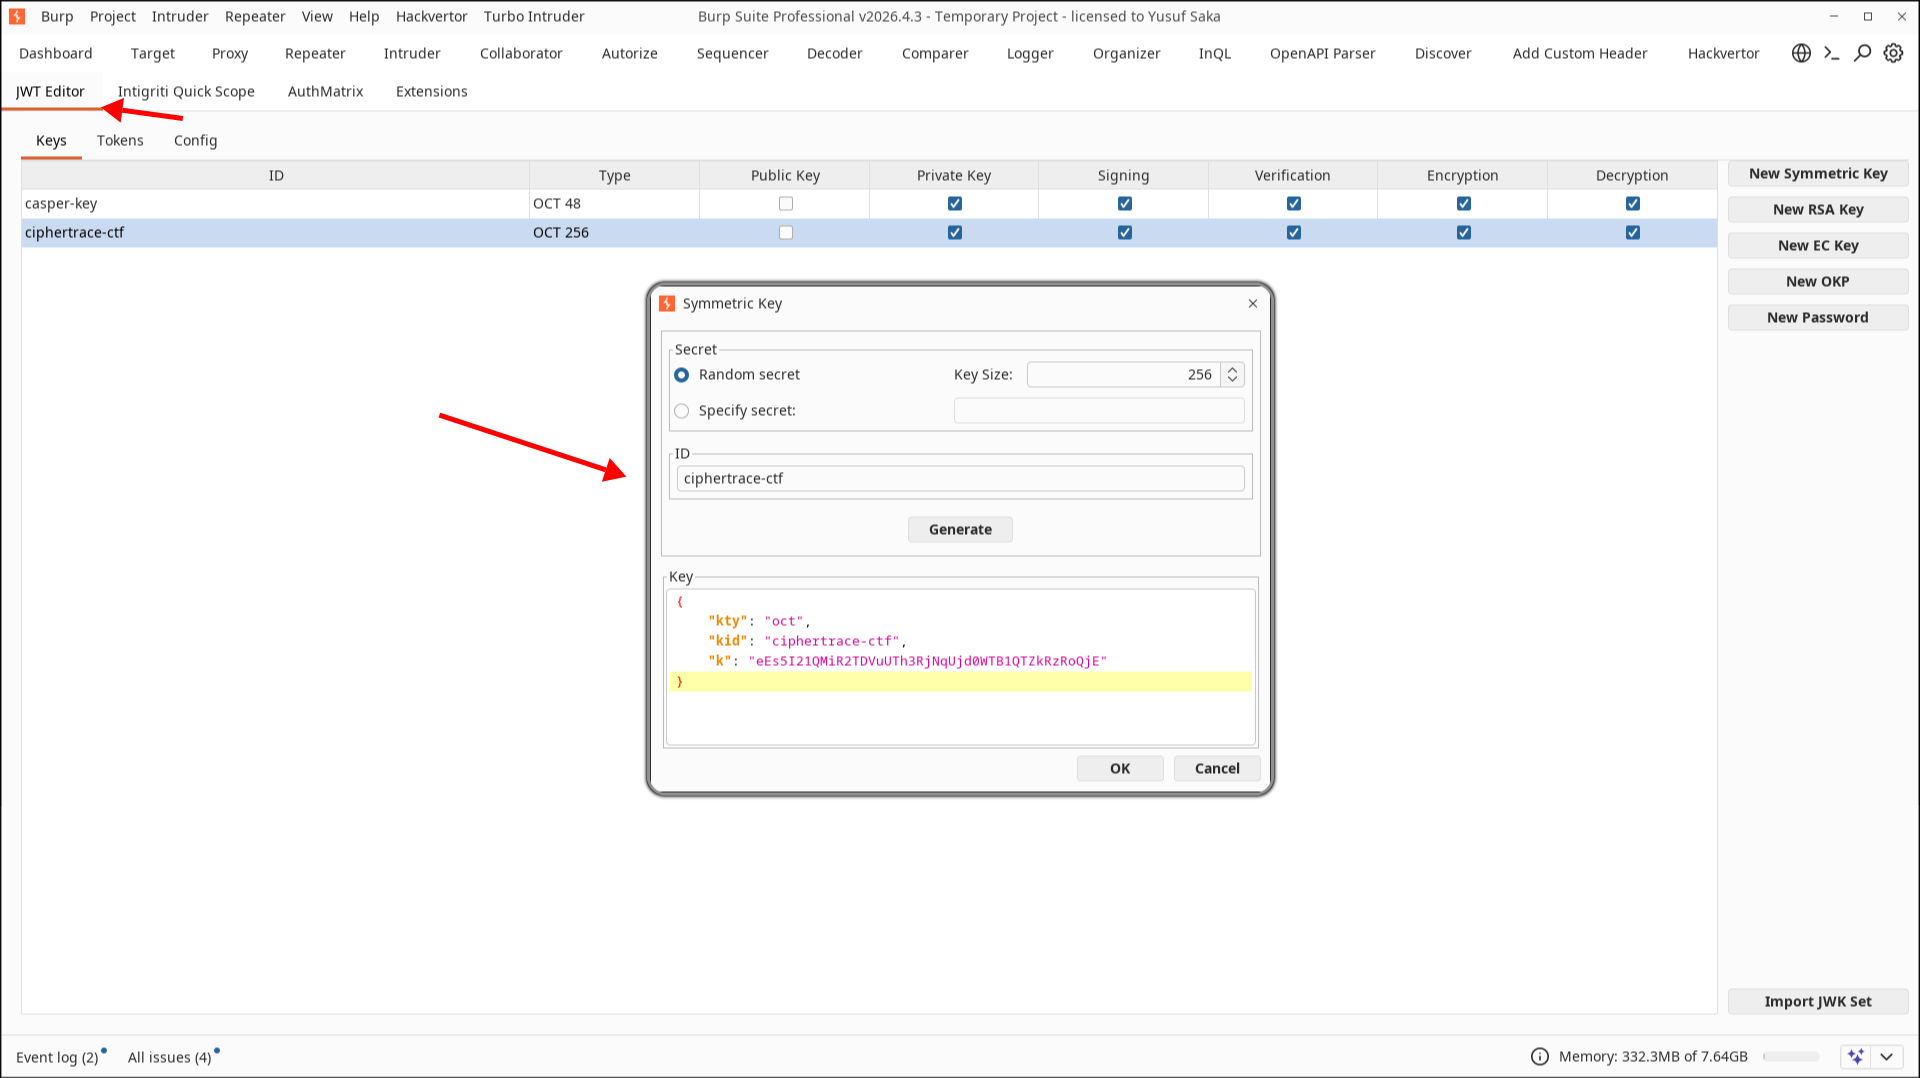
Using the JWT Editor tab we can create our own key to sign our tampered tokens.
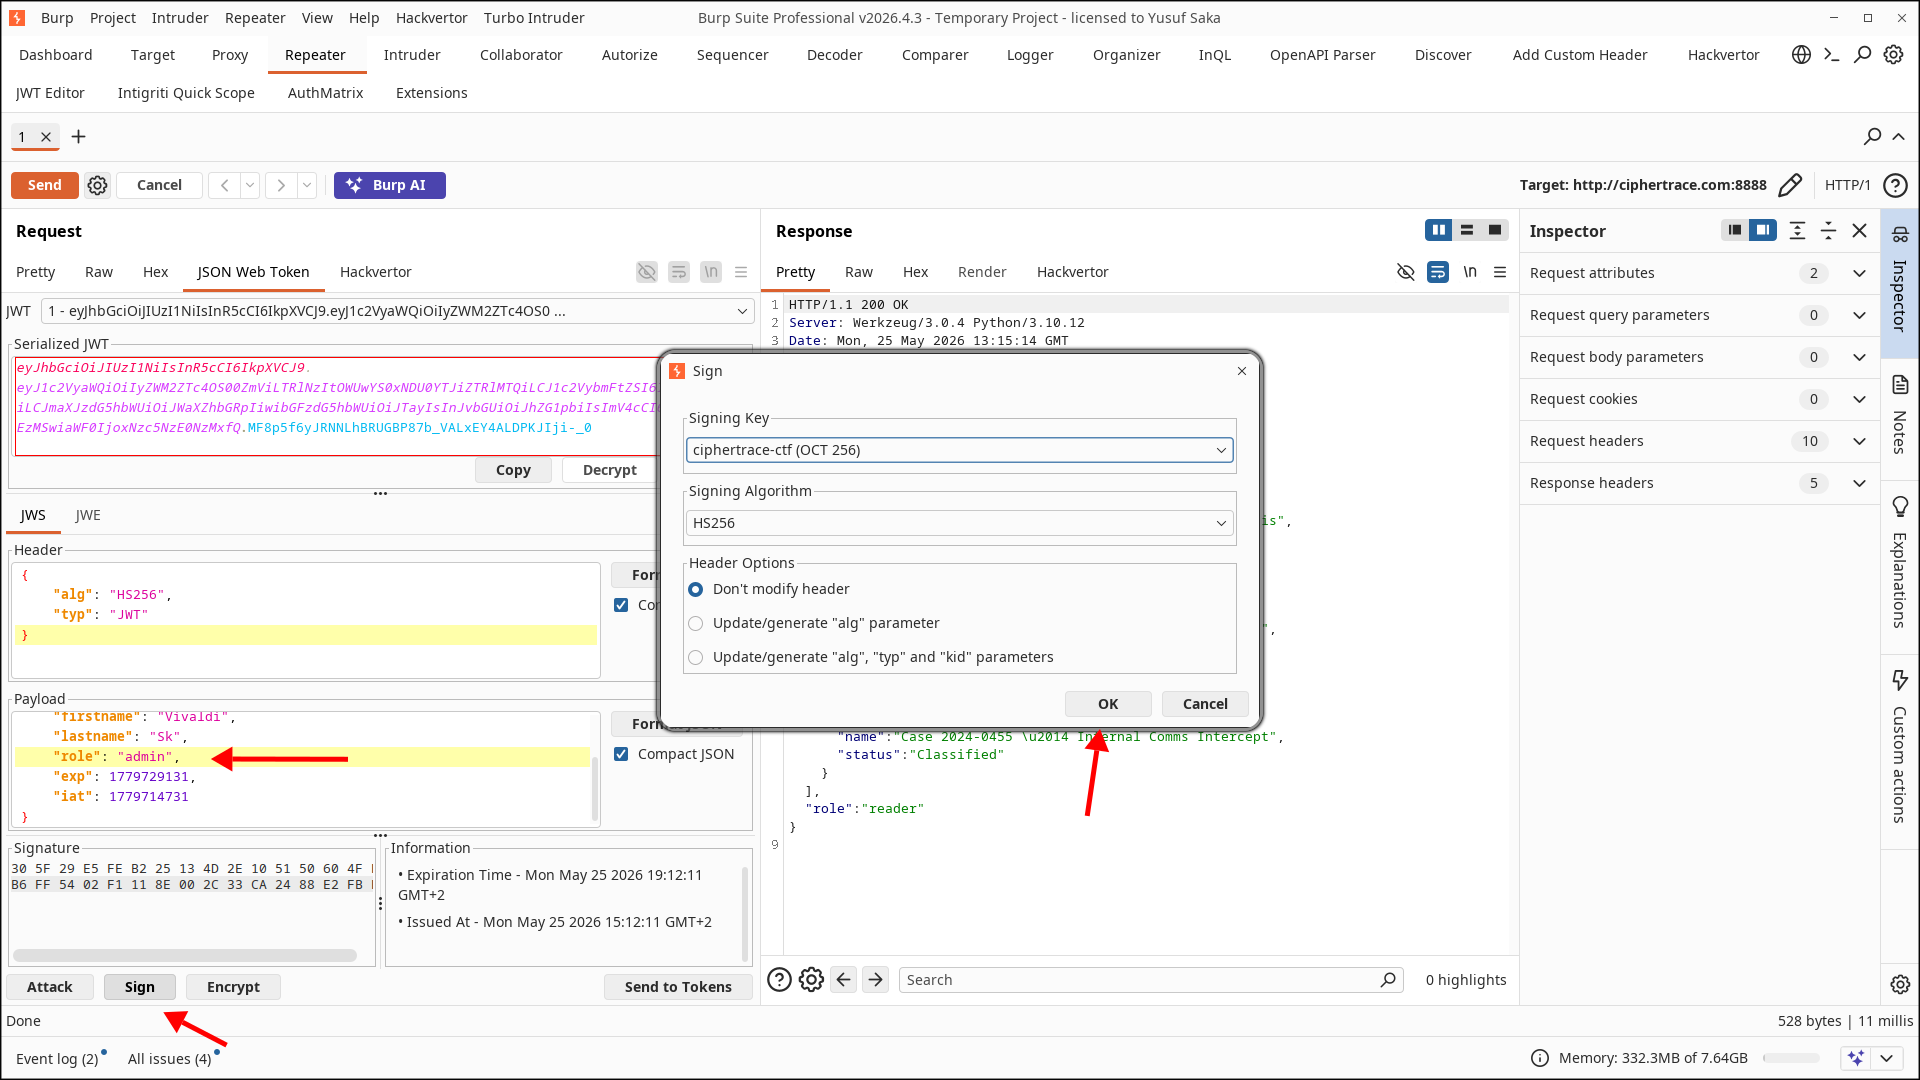
Now going through any request editor, I change the role to admin under JSON Web Token tab, click Sign and sign it using the key we created.
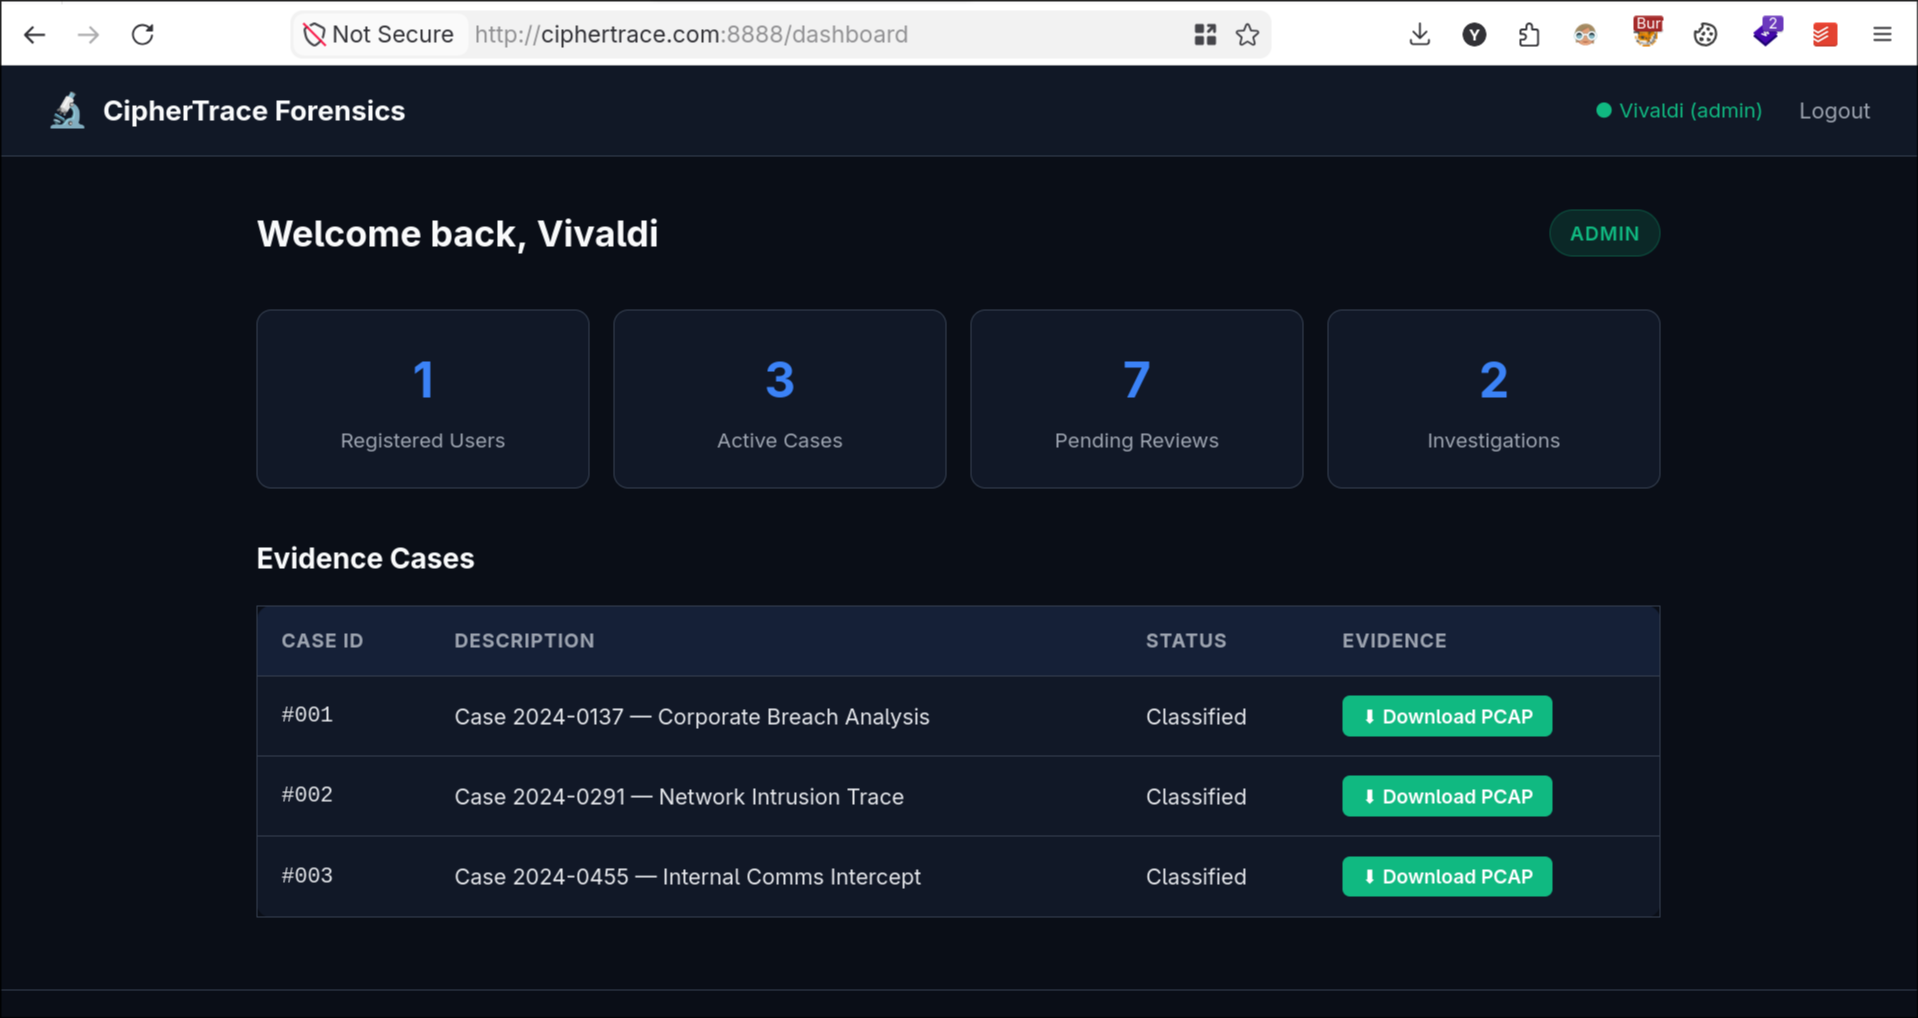
Now looking back at the dashboard we can see we exploited this vulnerability and tricked the backend that we have the sufficient rights.
Closing thoughts
Burp Suite is an amazing tool, and all these extensions make it even better. In this blog post I talked about some of my favourite extensions that are out there. If you enjoyed this, please let me know and I can write more posts like this to talk about other useful extensions for bug hunters, and web application security researchers that utilize Burp Suite in their day to day life and want to bring most out of it.
I hope you enjoyed it, see you on the next one.